Revell Me-410B-2/U4 w/Aires detail sets


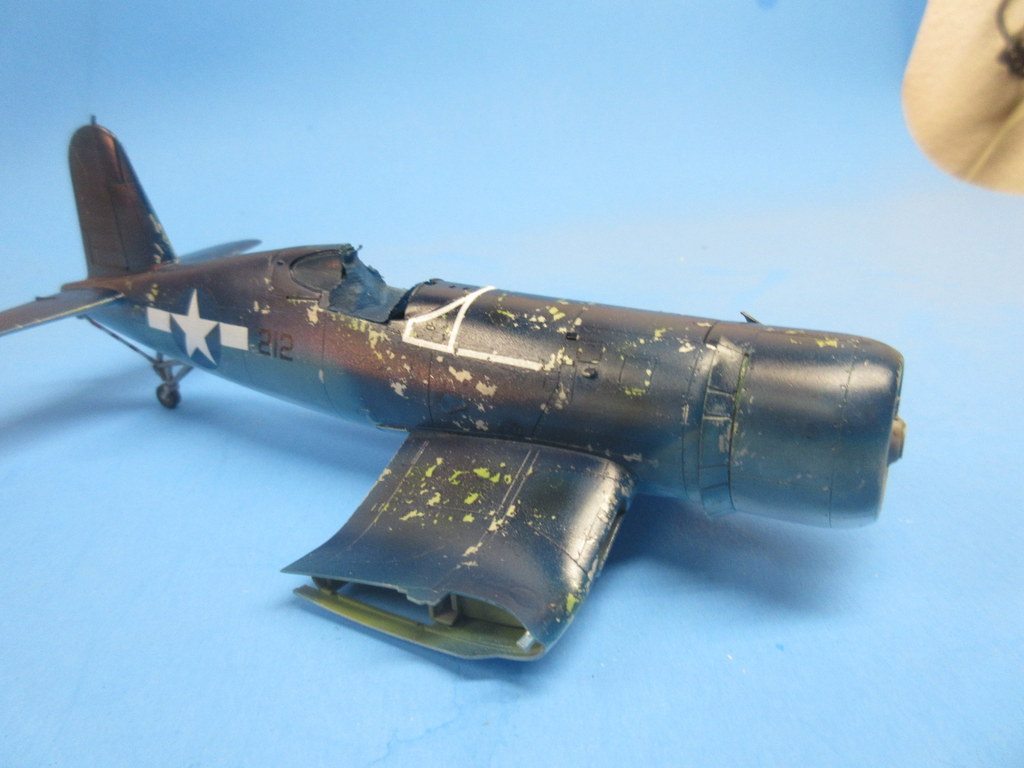
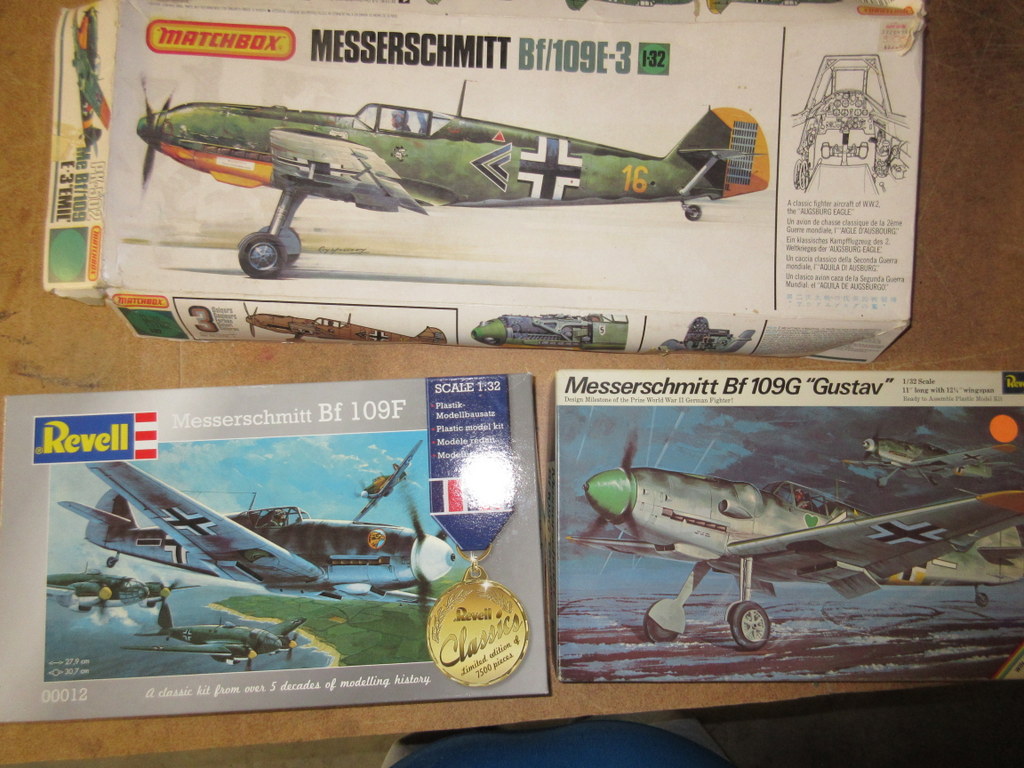
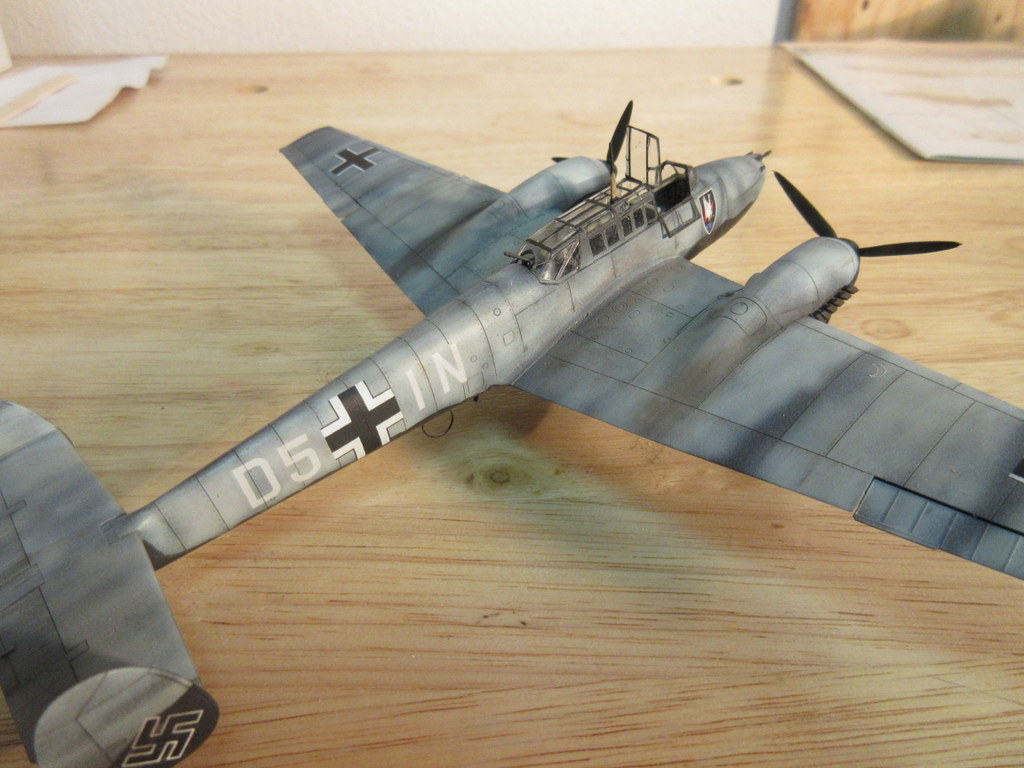
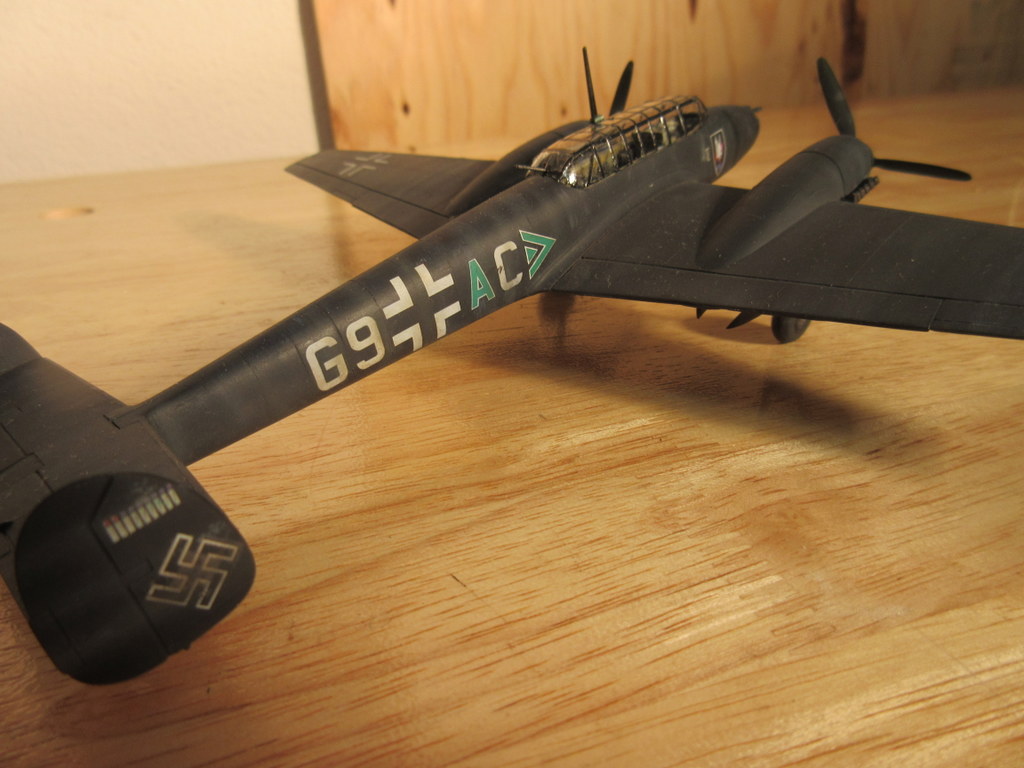
Not sure how or why this one popped out of the stash pile.  I’ve fondled its fine styrene lines a few times from the box and I even had the Aires cockpit set in the aftermarket box.  This is the Revell version (not Promodeler) and is the version with the 50mm cannon; a bomber buster.

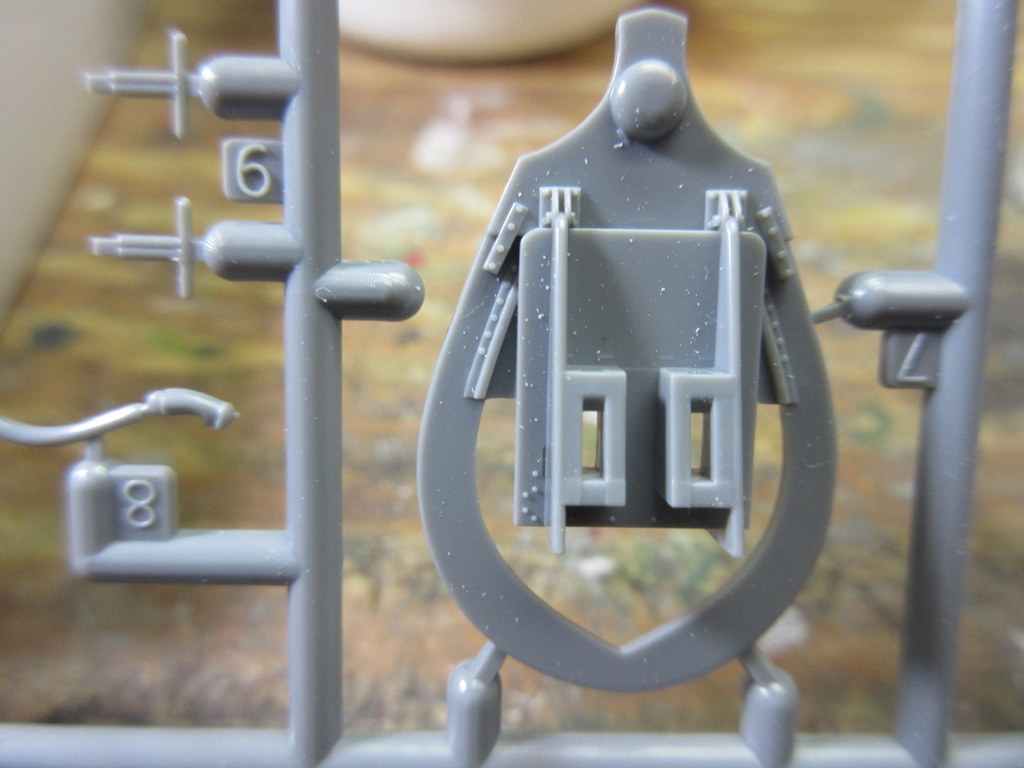
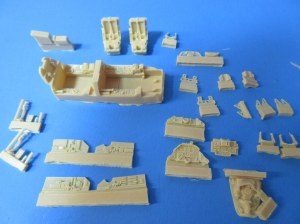
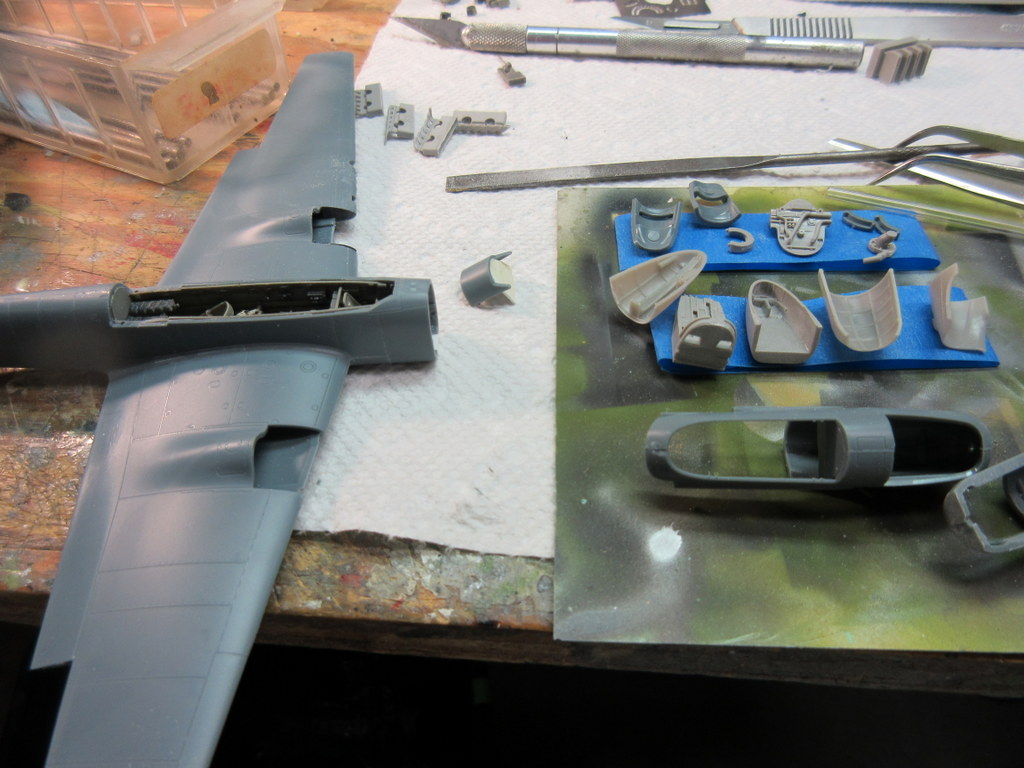
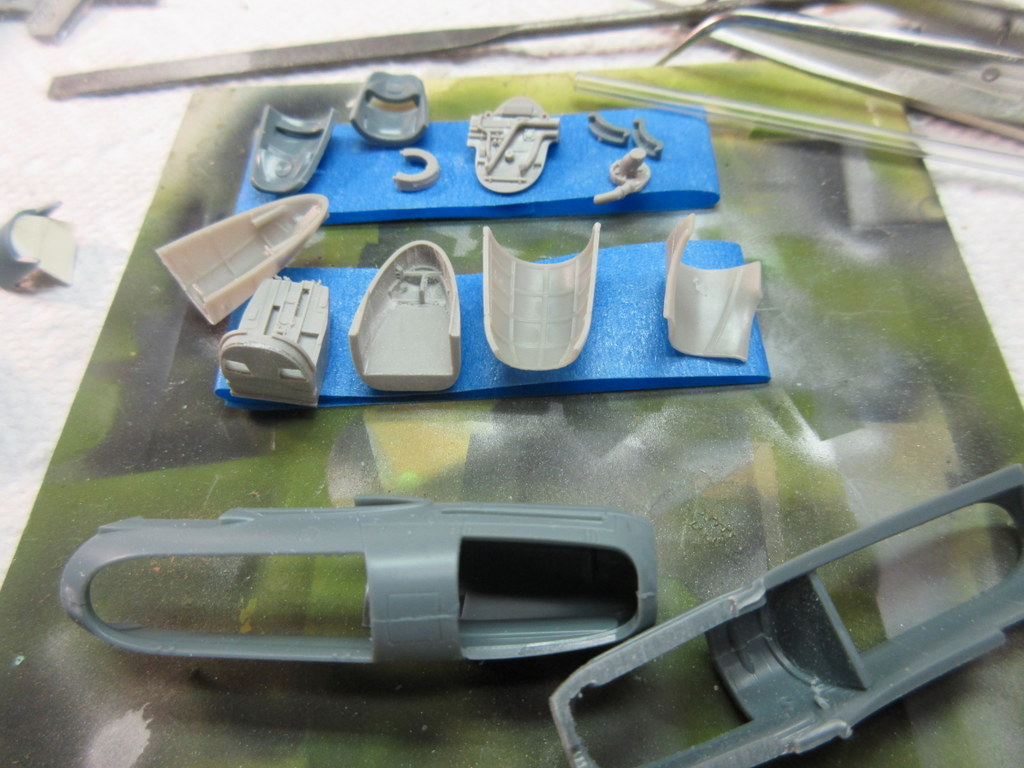
I decided to build up the fuselage first, starting with the resin cockpit.  It is a very nice set and replaces an okay cockpit from the kit.  But you can see from the kit detail compared to the Aires detail, it adds a lot (even though most of it you can’t see after you button it up.

vs.

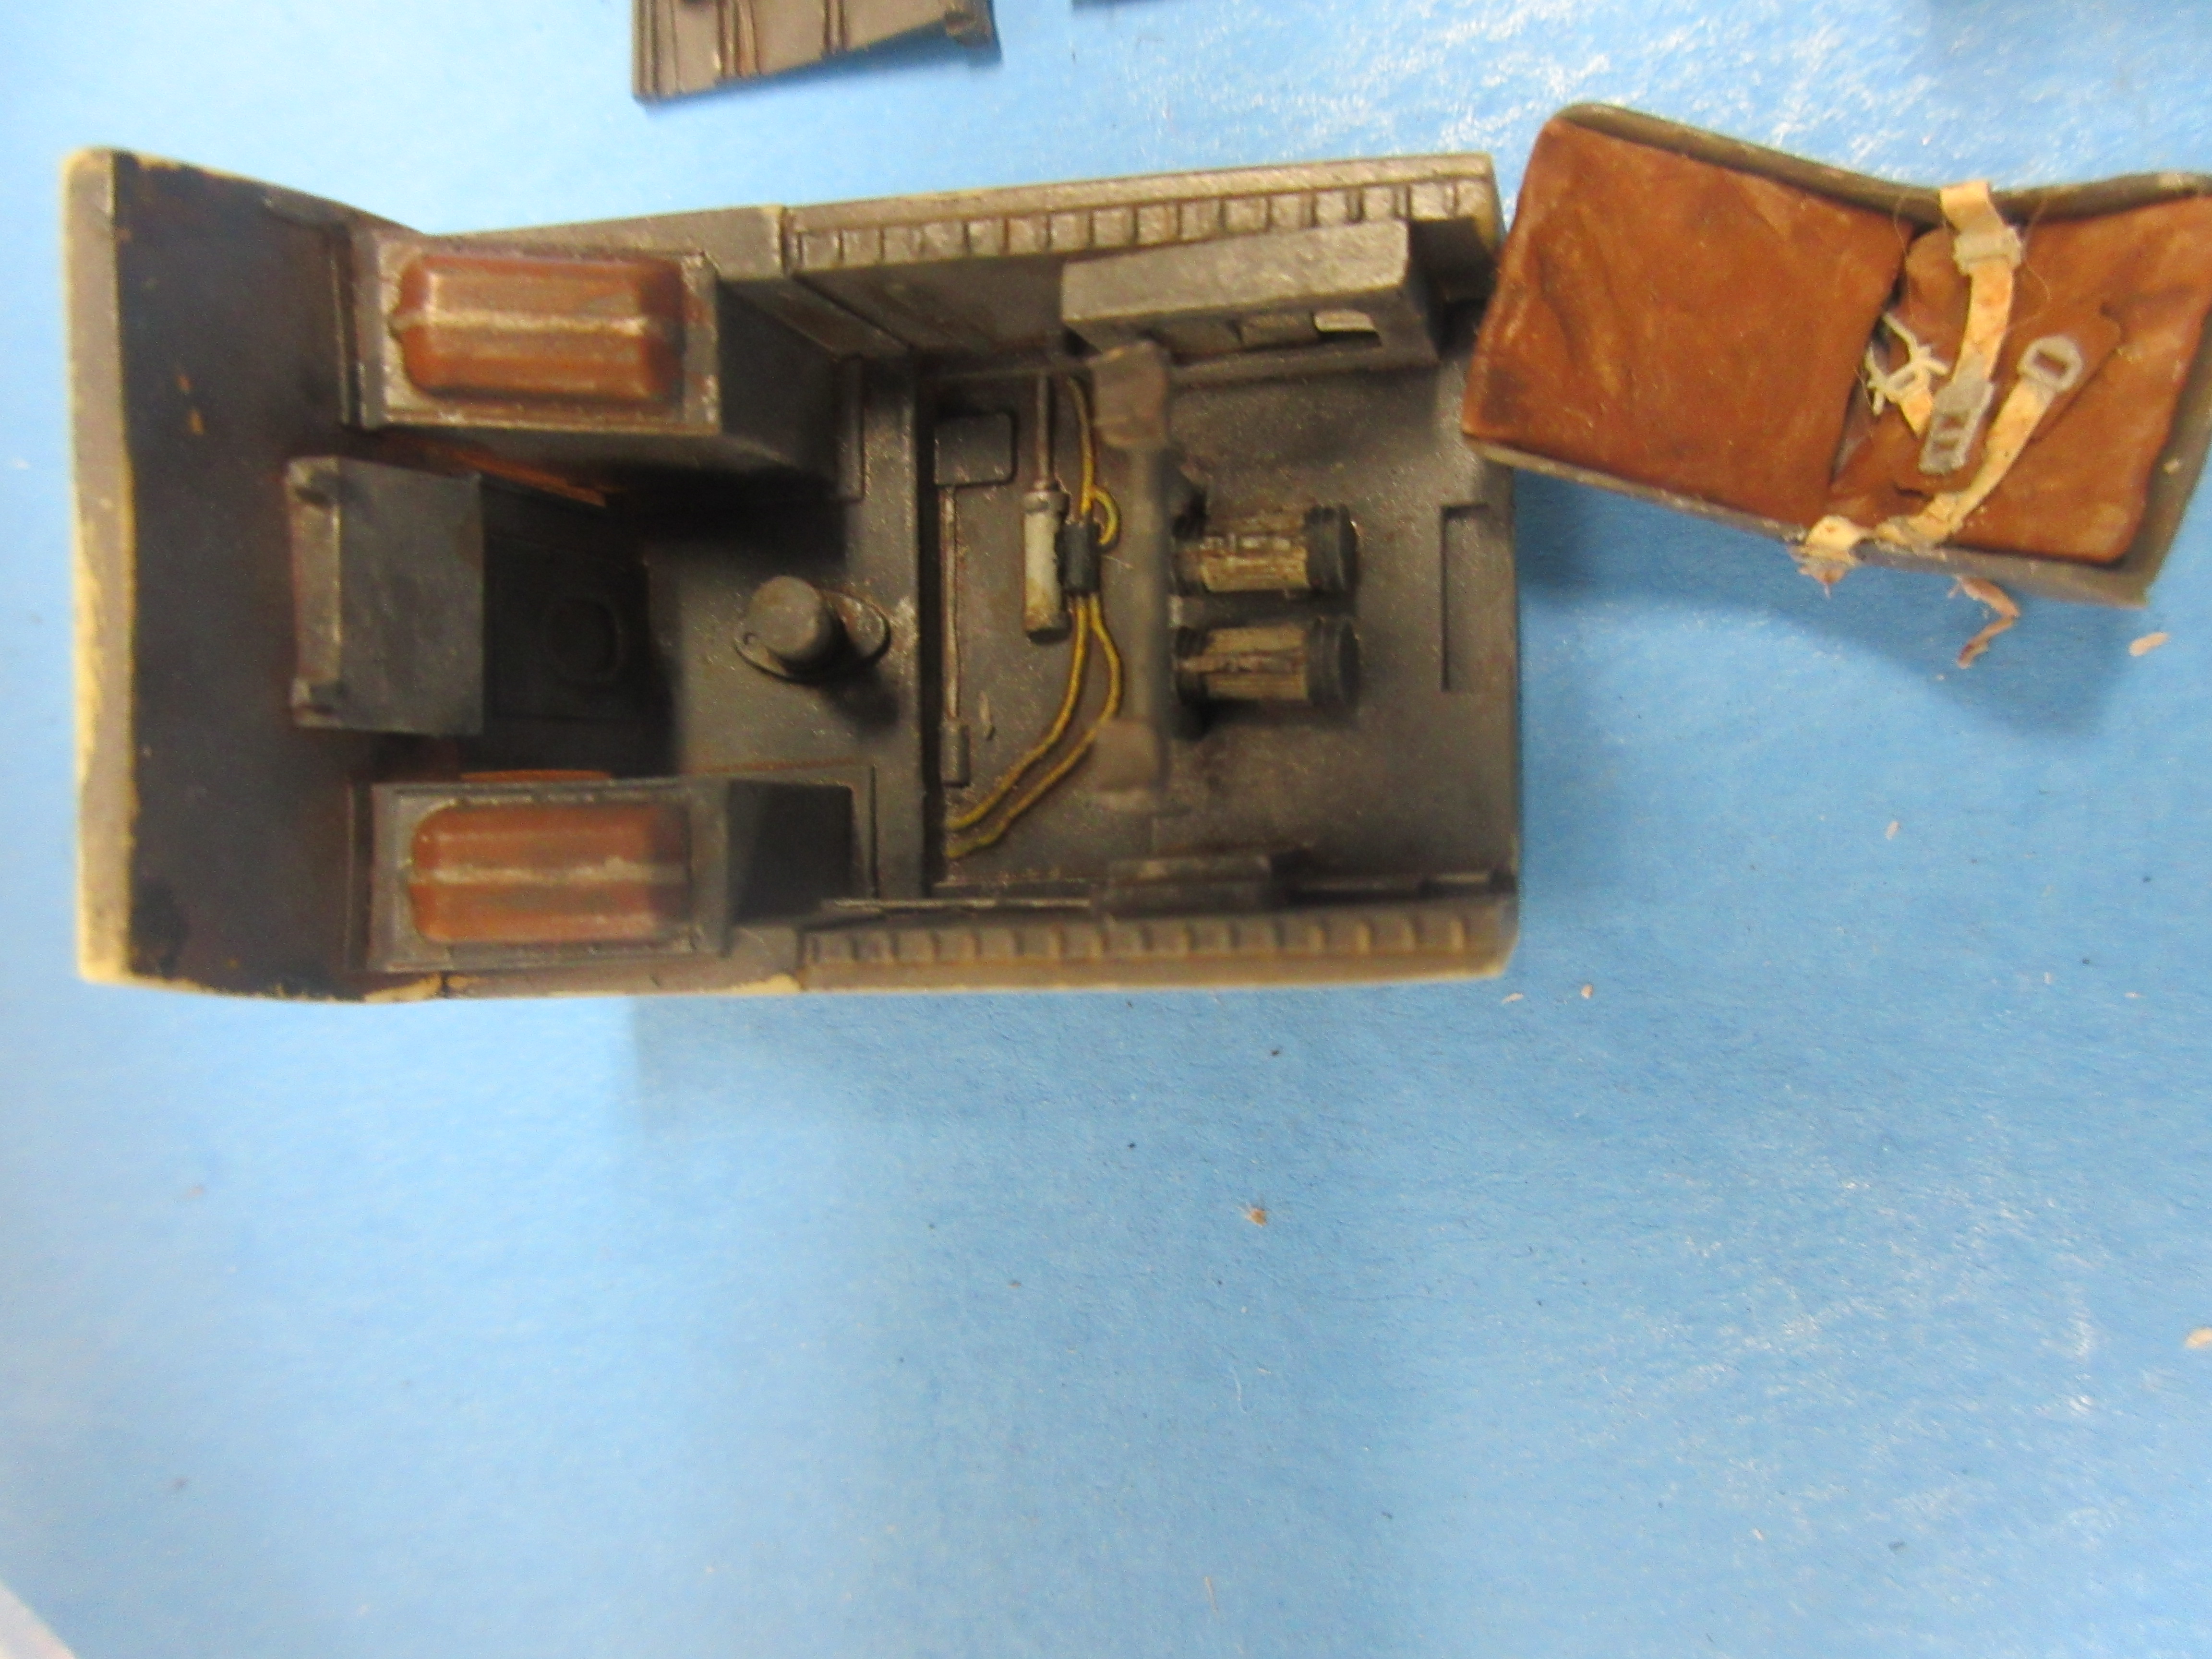
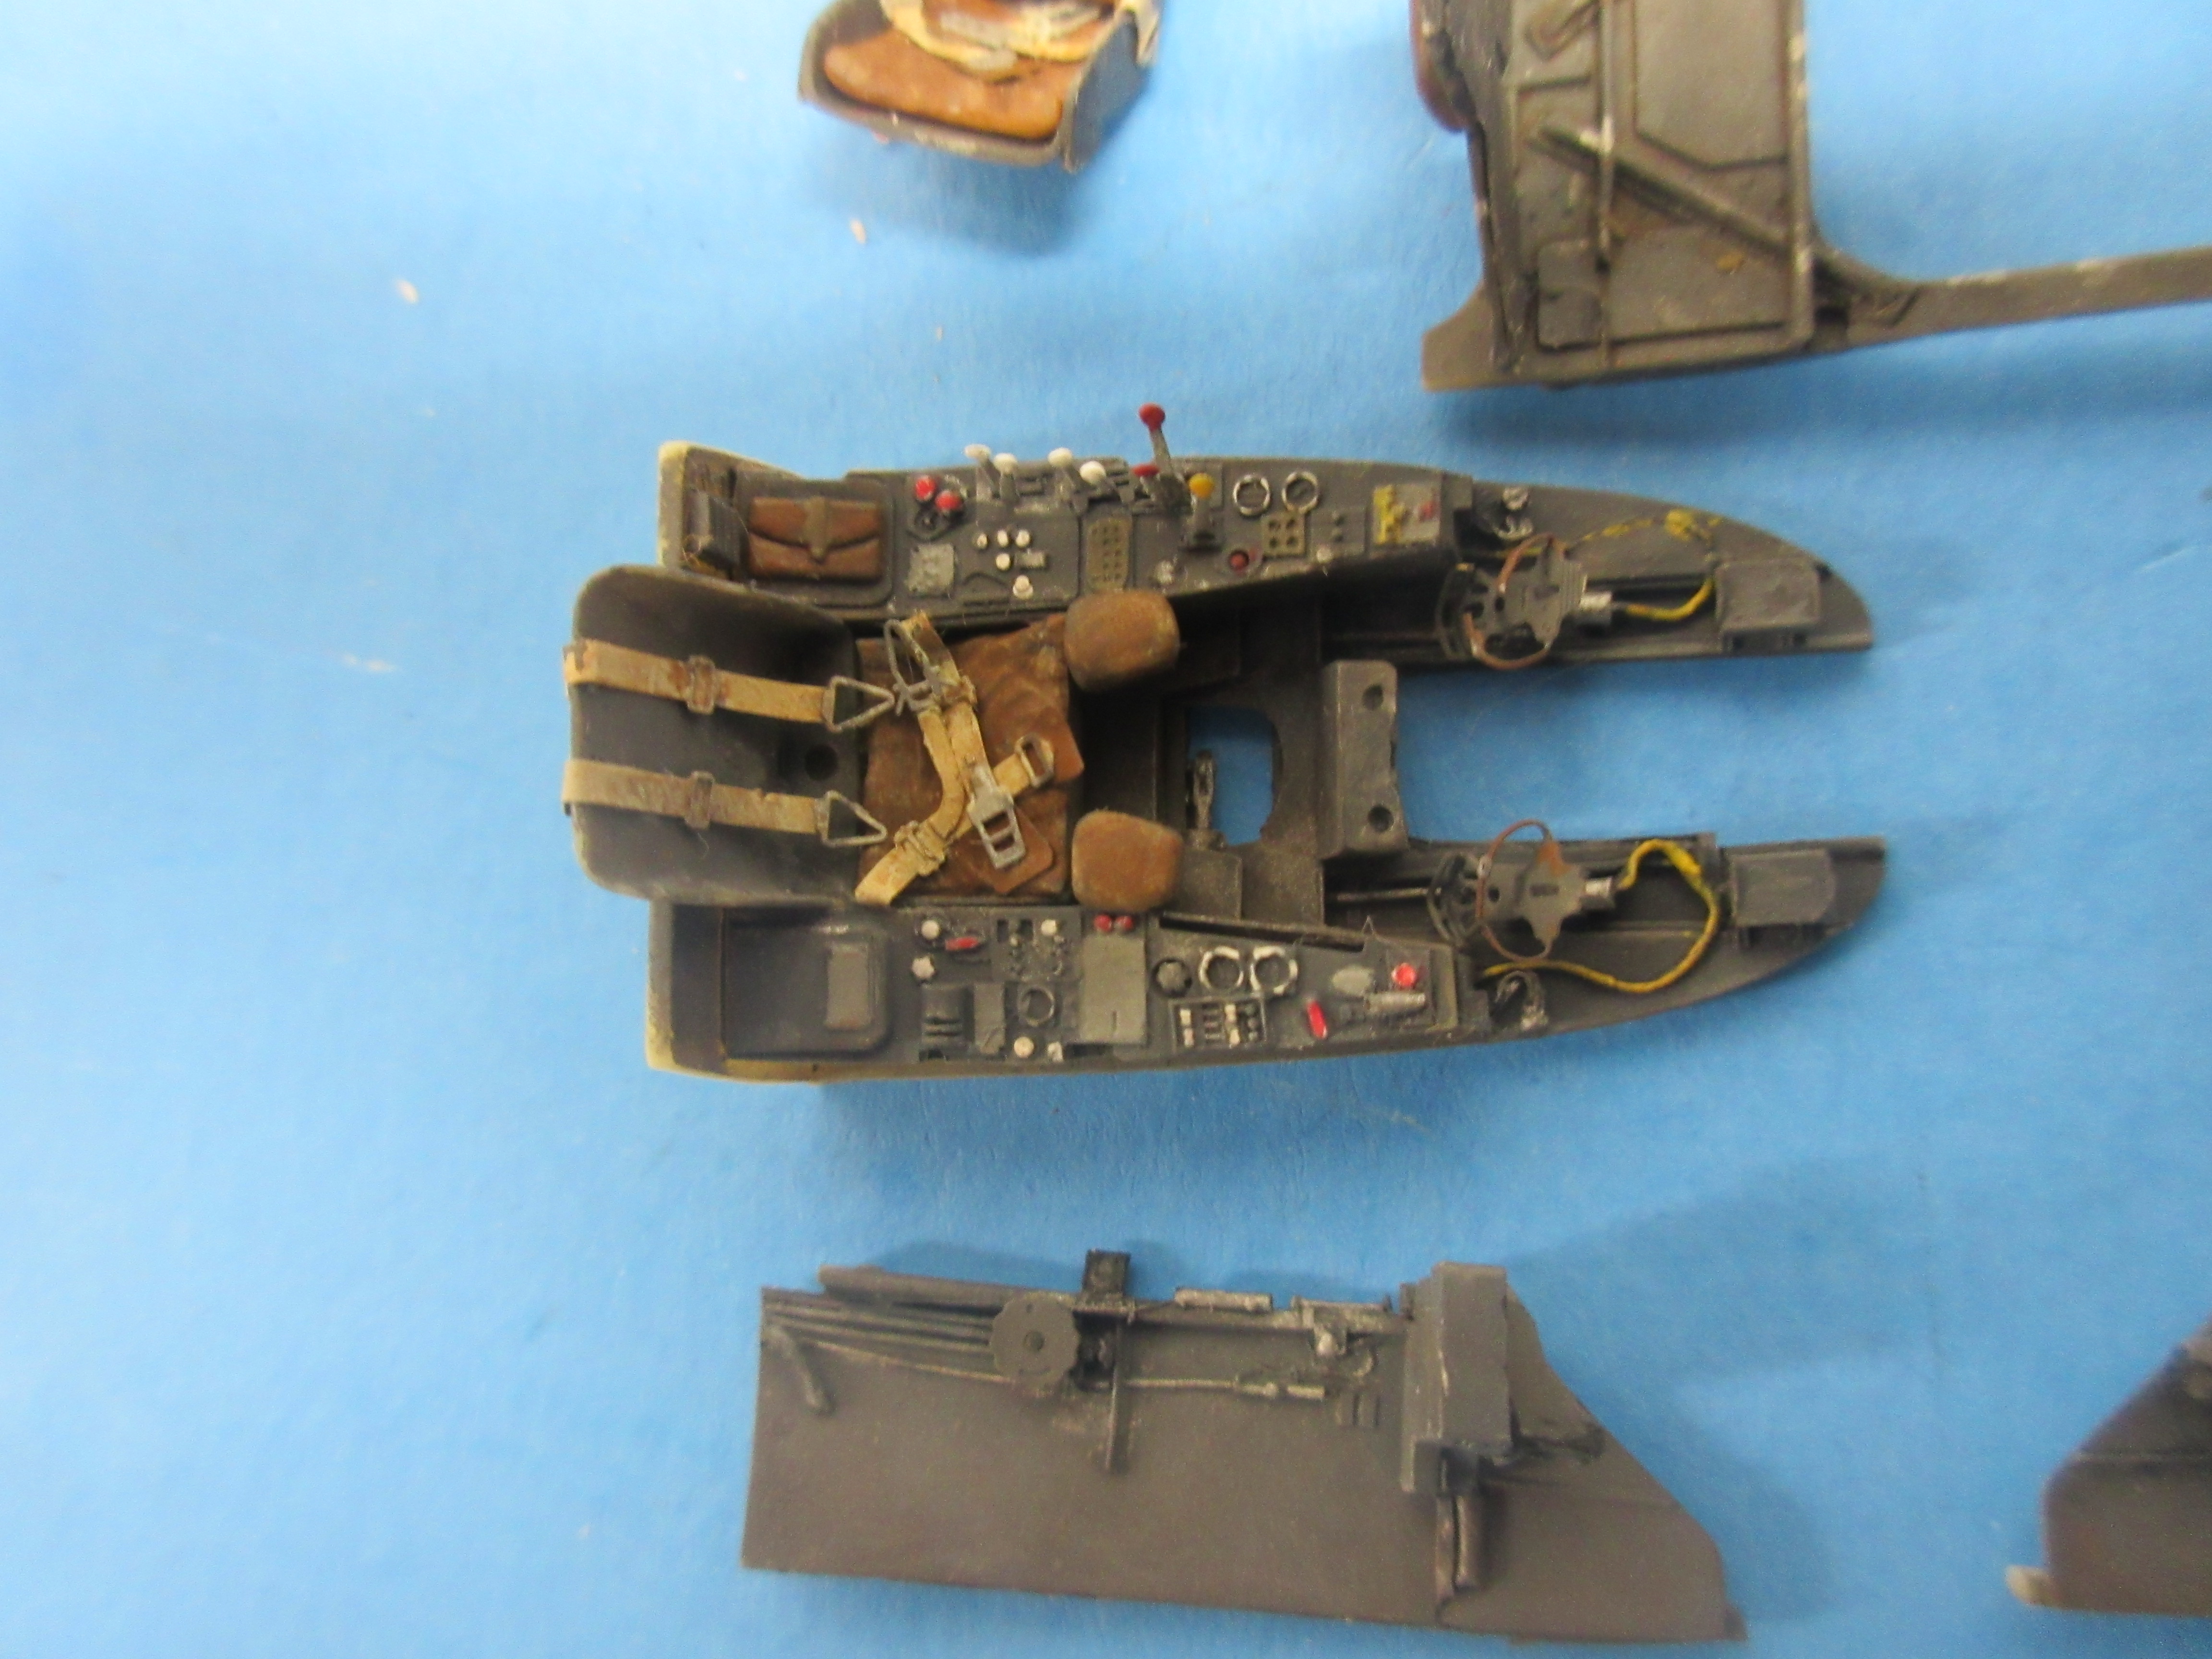
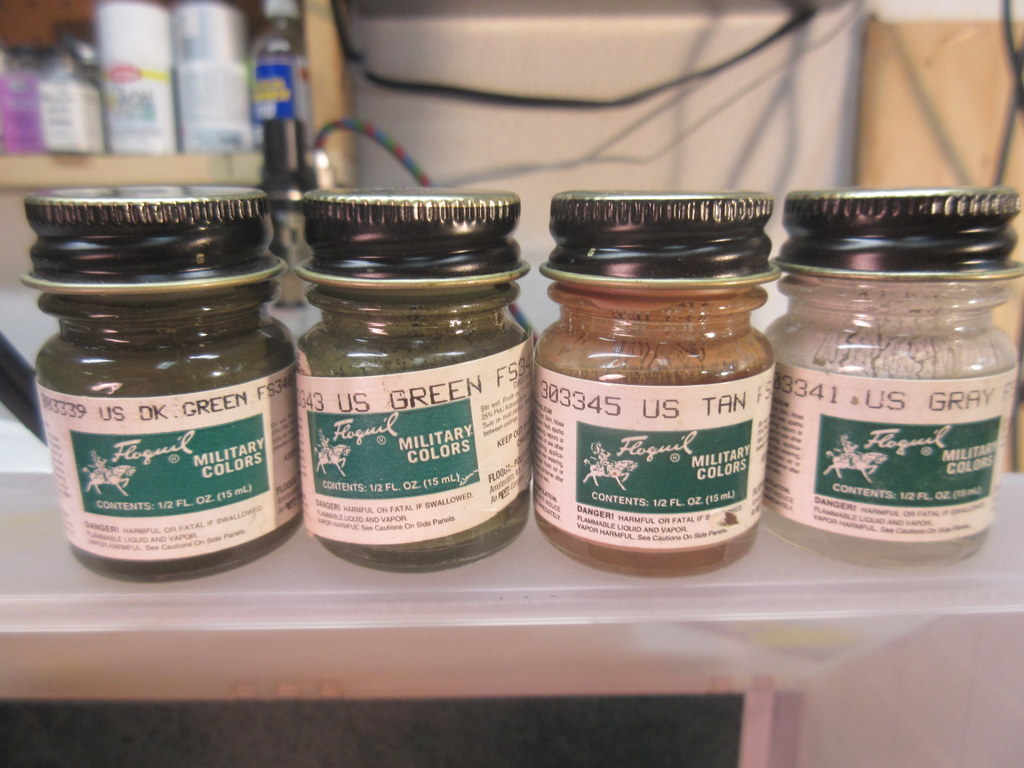
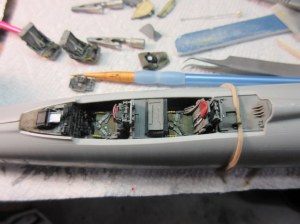
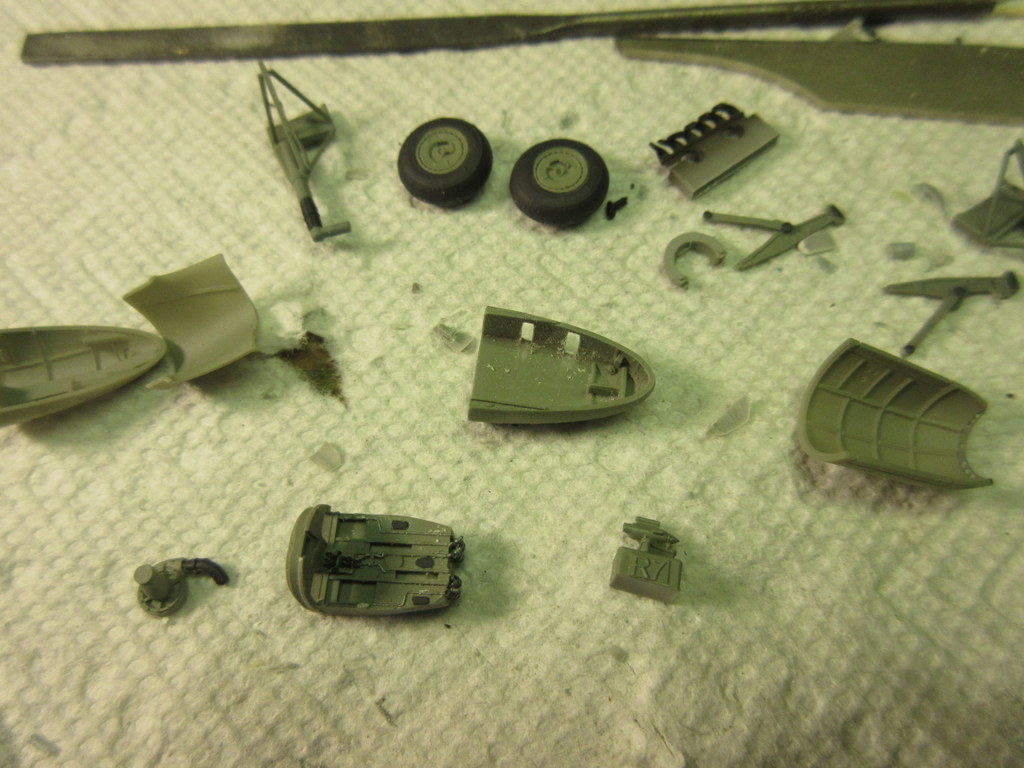
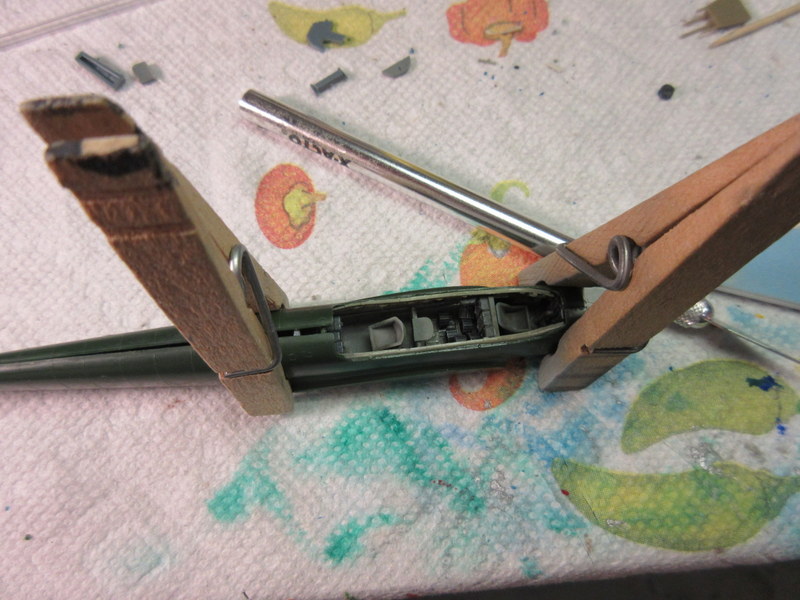
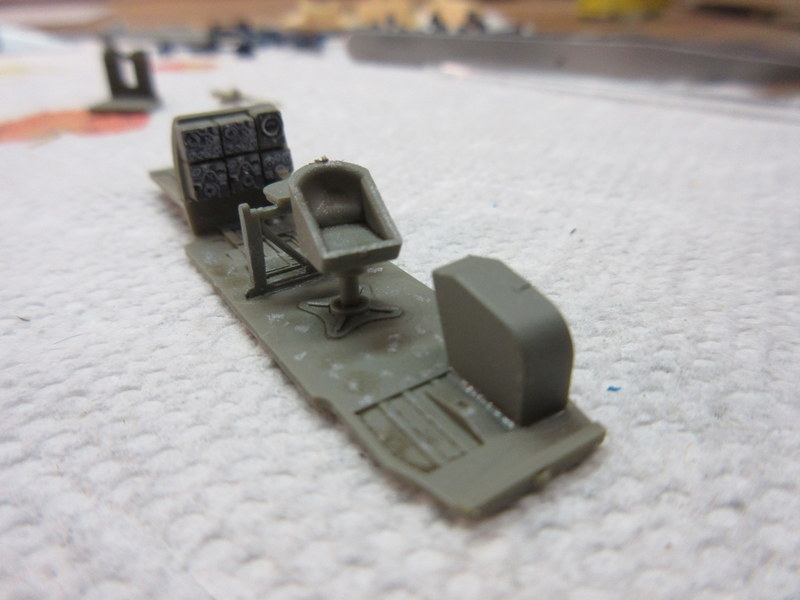
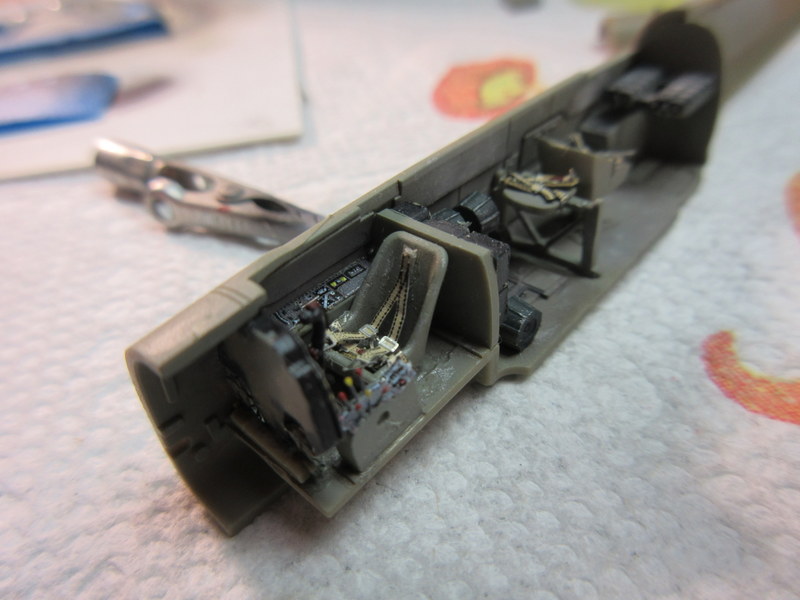
The cockpit is made up of a rear gunner section and a forward cockpit including details like seat cushions and a photo-etch set for instruments, seatbelts, and levers.  Here they are all painted up looking pretty good.  The cockpit was painted with Vallejo Model Air, sealed with Future, and weathered with oils and pastels.  Chipping and details were painted with a mix of paints, mostly Testors enamels.

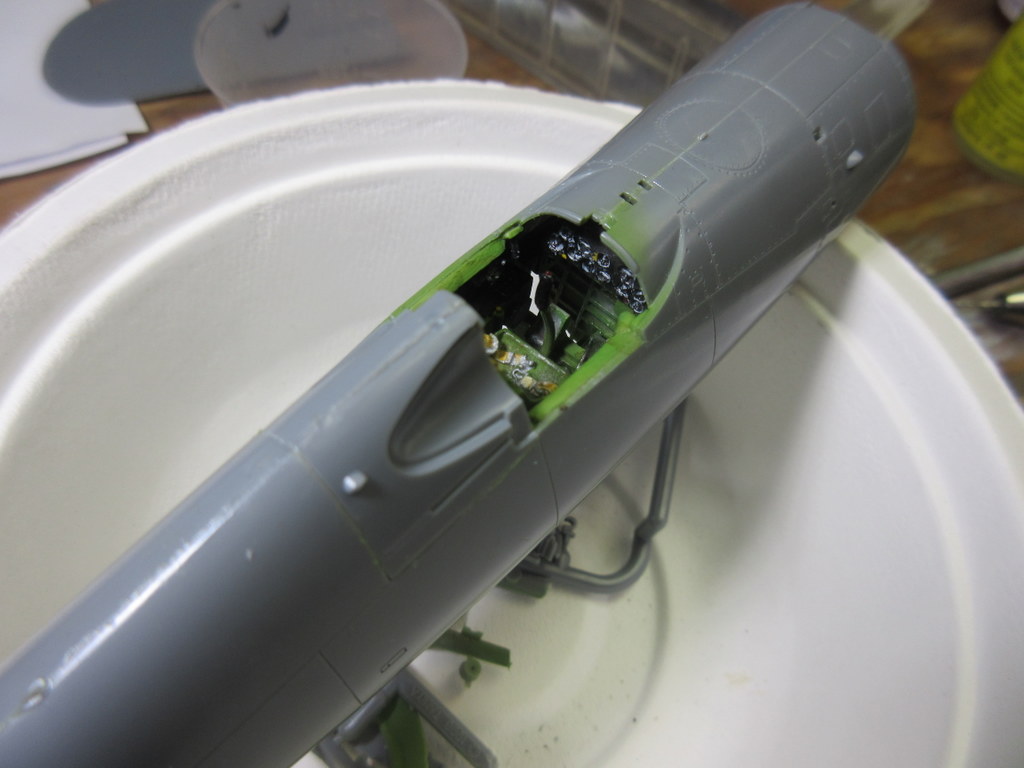
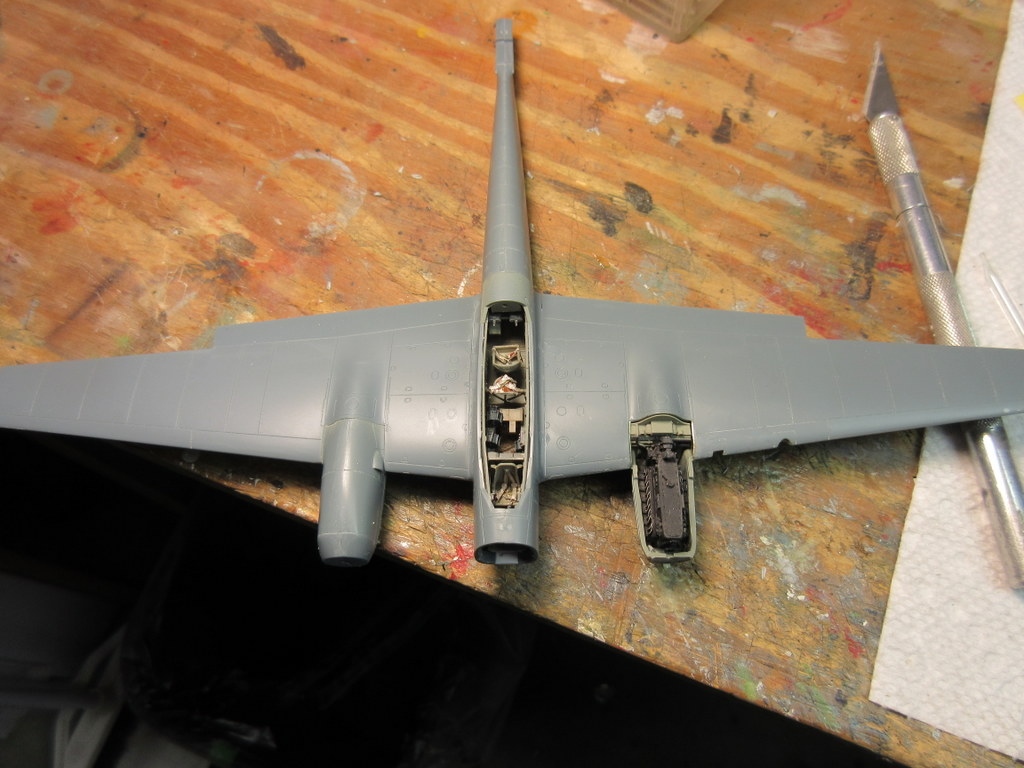
It took a little sanding down of the resin parts to get it to fit and once it was at the right place the cockpit just slid into place.


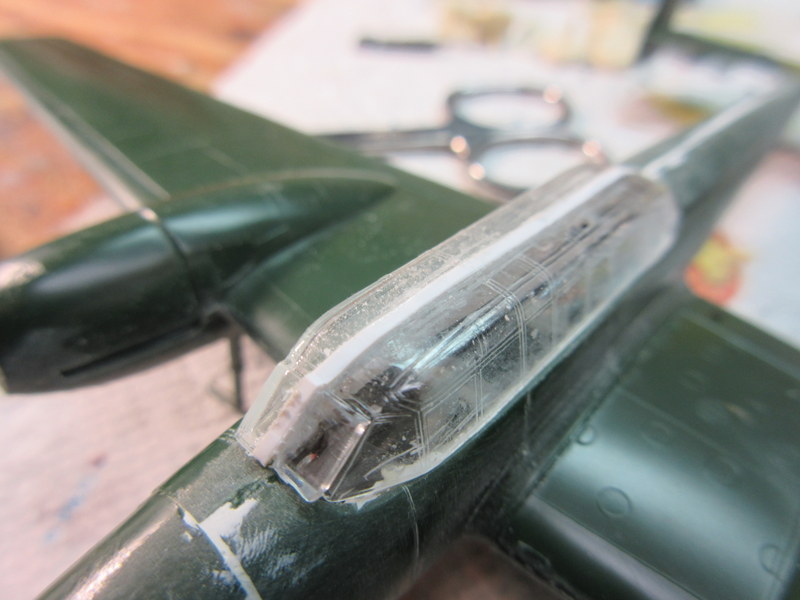
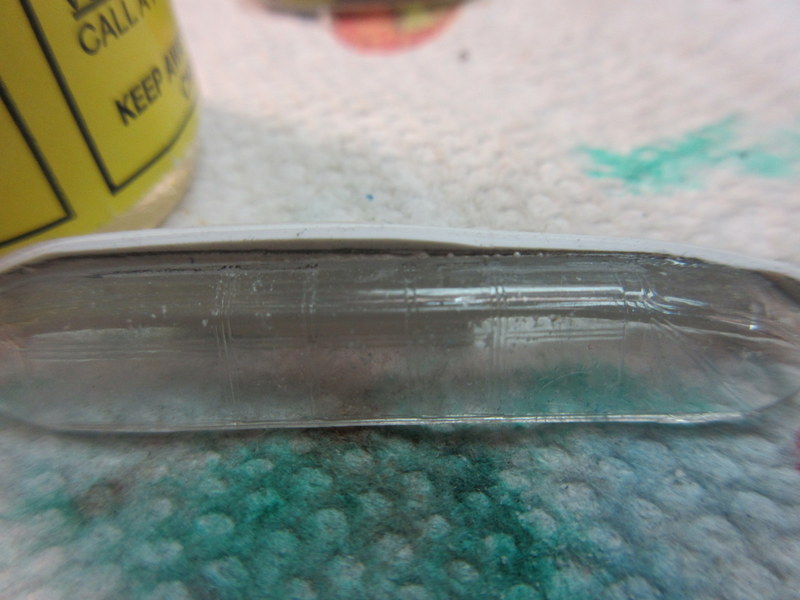
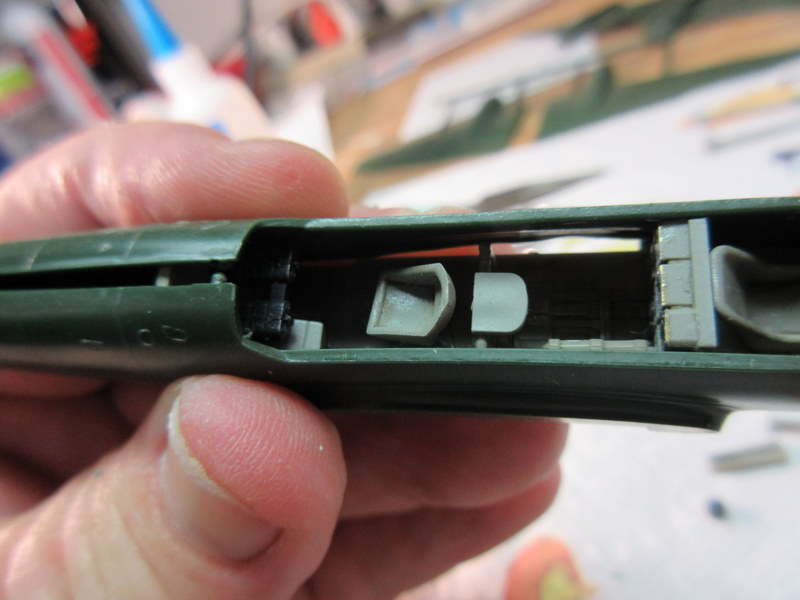
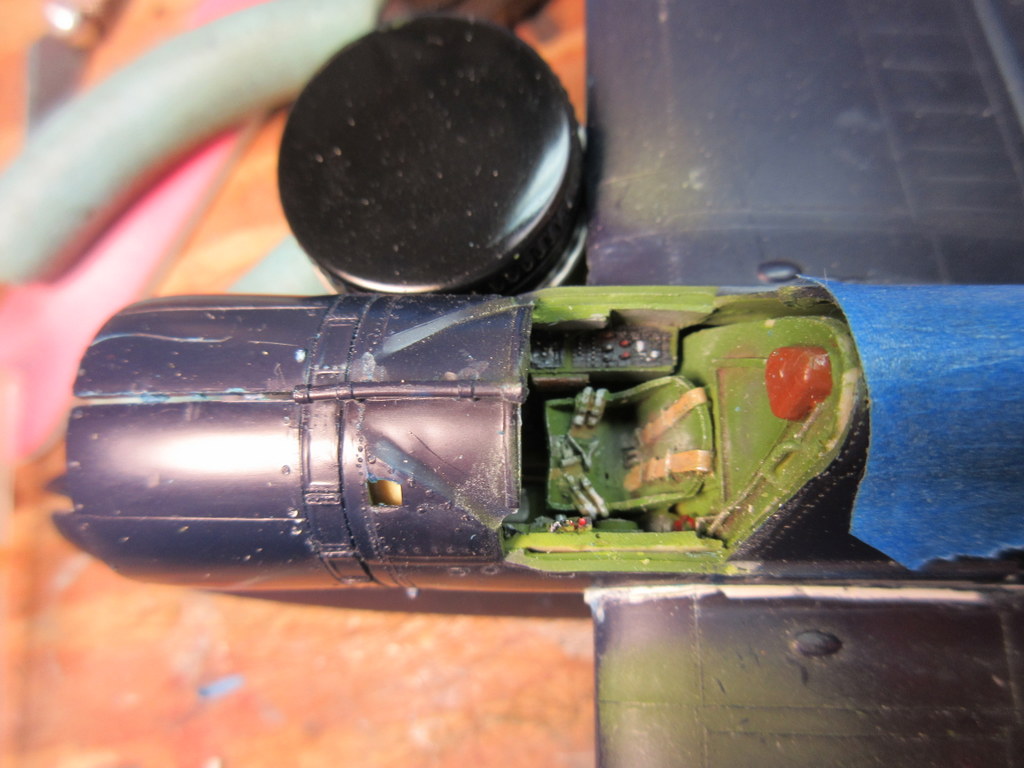
The method I used was to glue the fuselage together and then push the rear cockpit into the fuselage.  The backend of the top of the cockpit has to go into the fuselage so that the raised feature is aligned with the beginning of the top of the fuselage.  A certain part of the Aires cockpit top needs to go back into the fuselage.  Like this

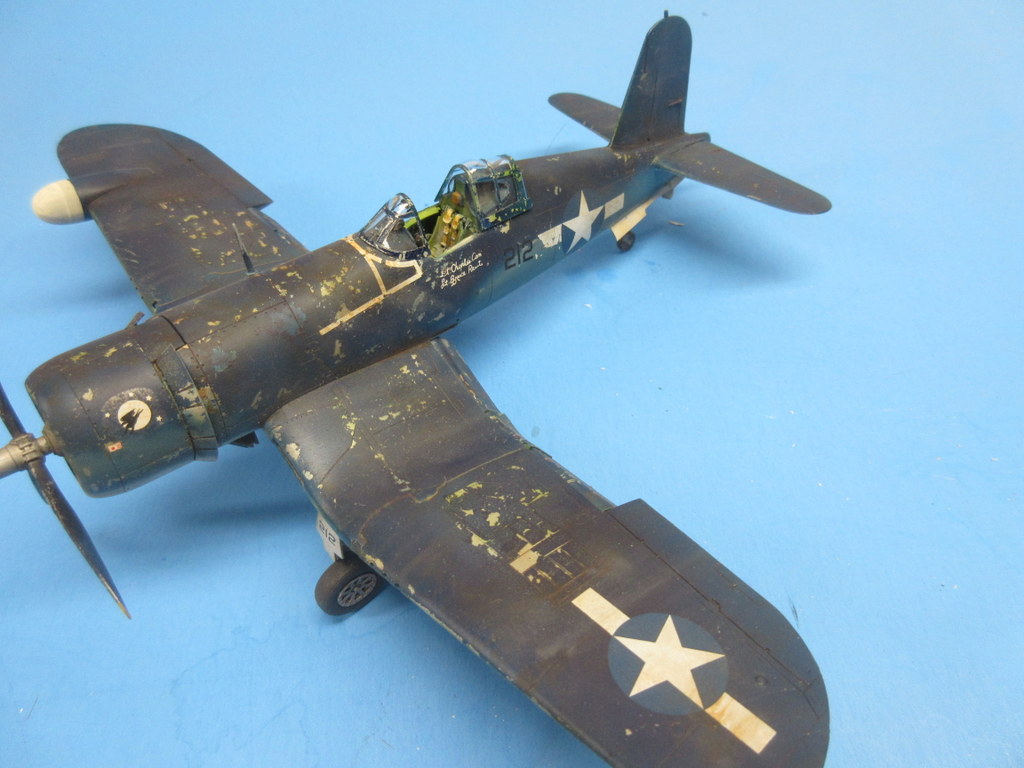
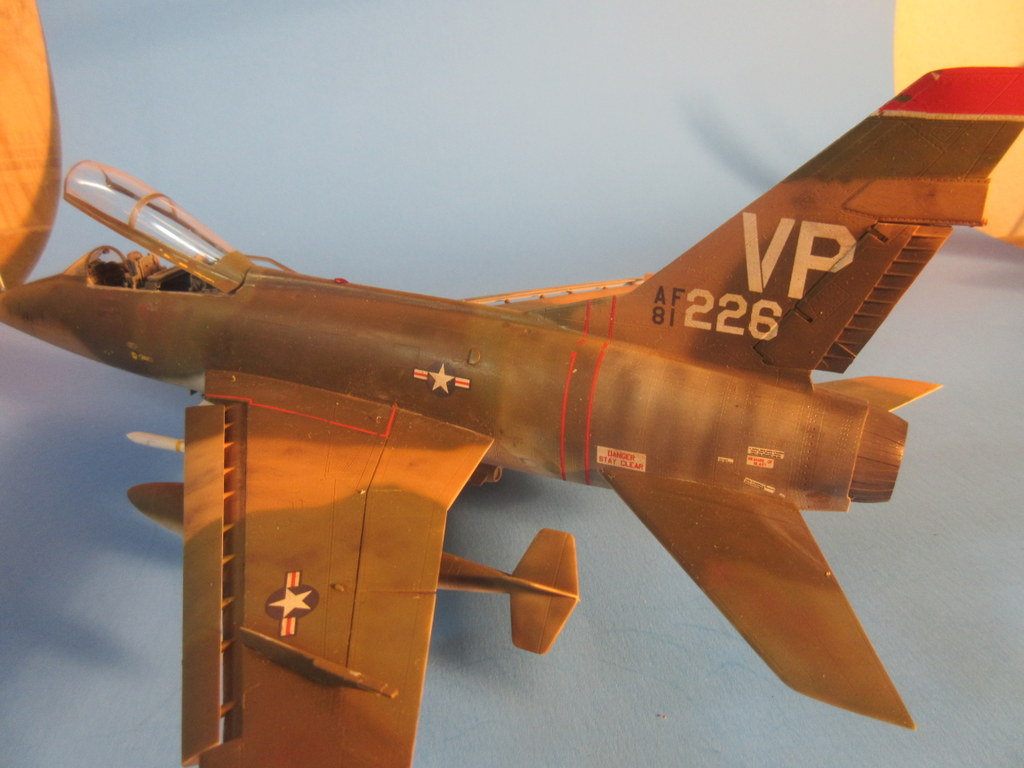
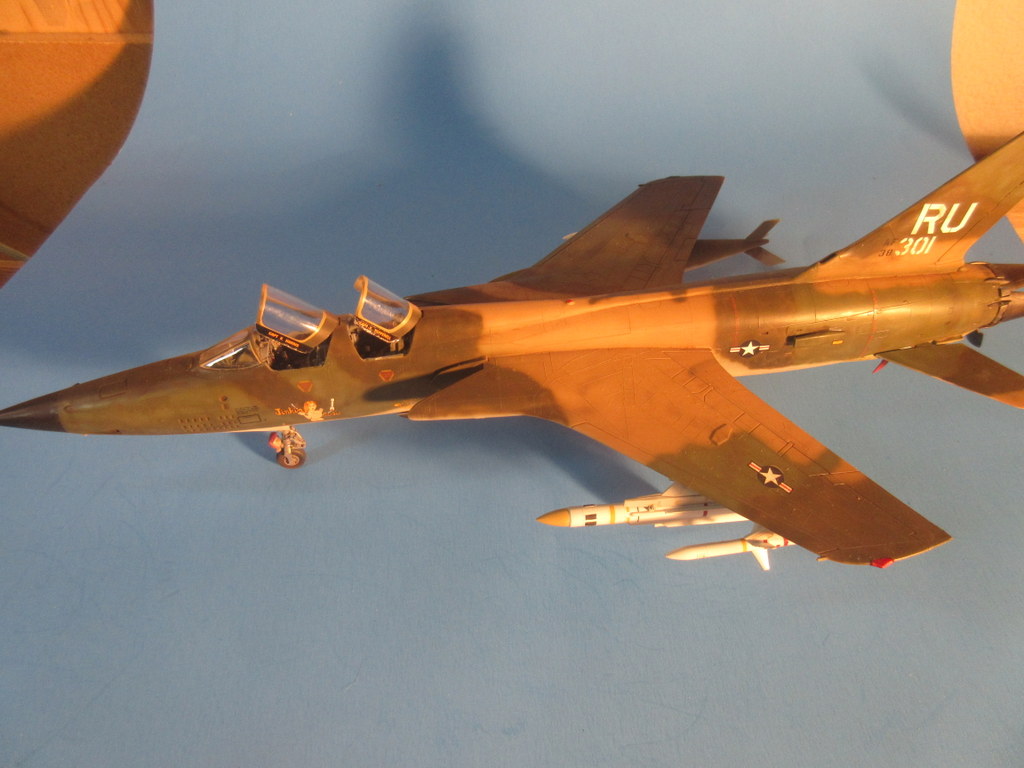
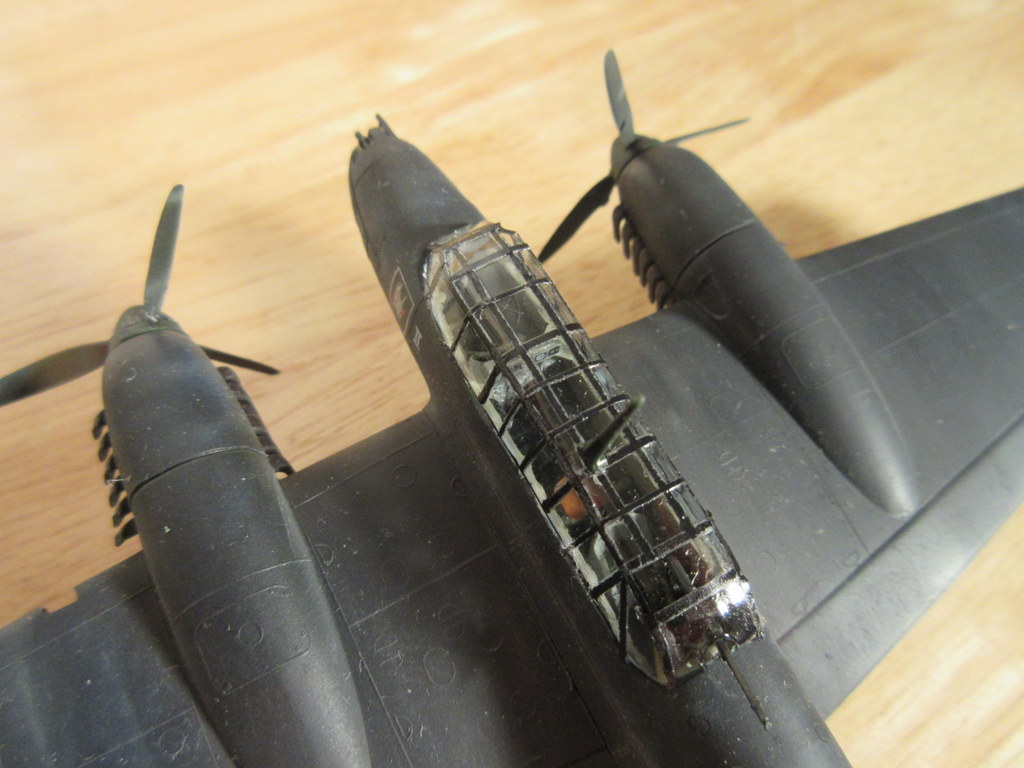
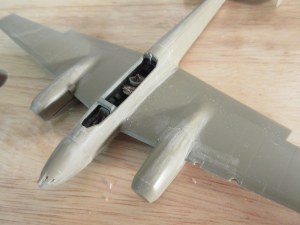
It took me a while to figure this out.  Once that is done you can glue the front part of the cockpit to the top of the cockpit and it should all fit nicely.  I used the front window of the fuselage to ensure the fuselage would close up properly and the rest of the parts like lower gun covers and cockpit glass would fit.  And you can see here they do.

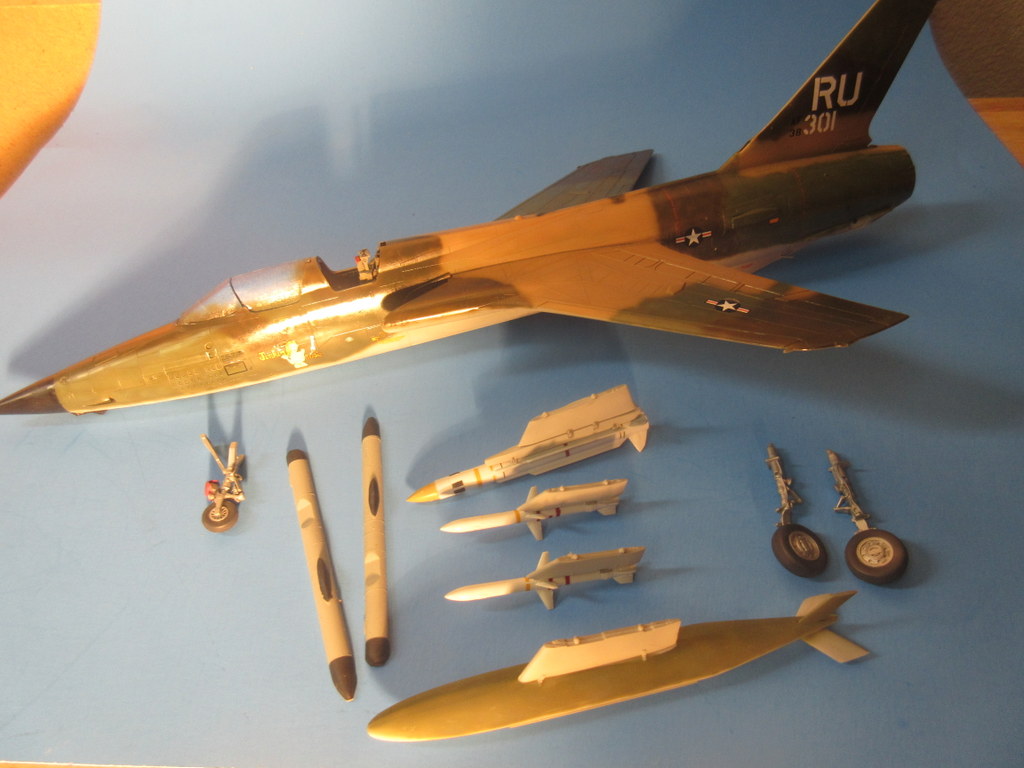
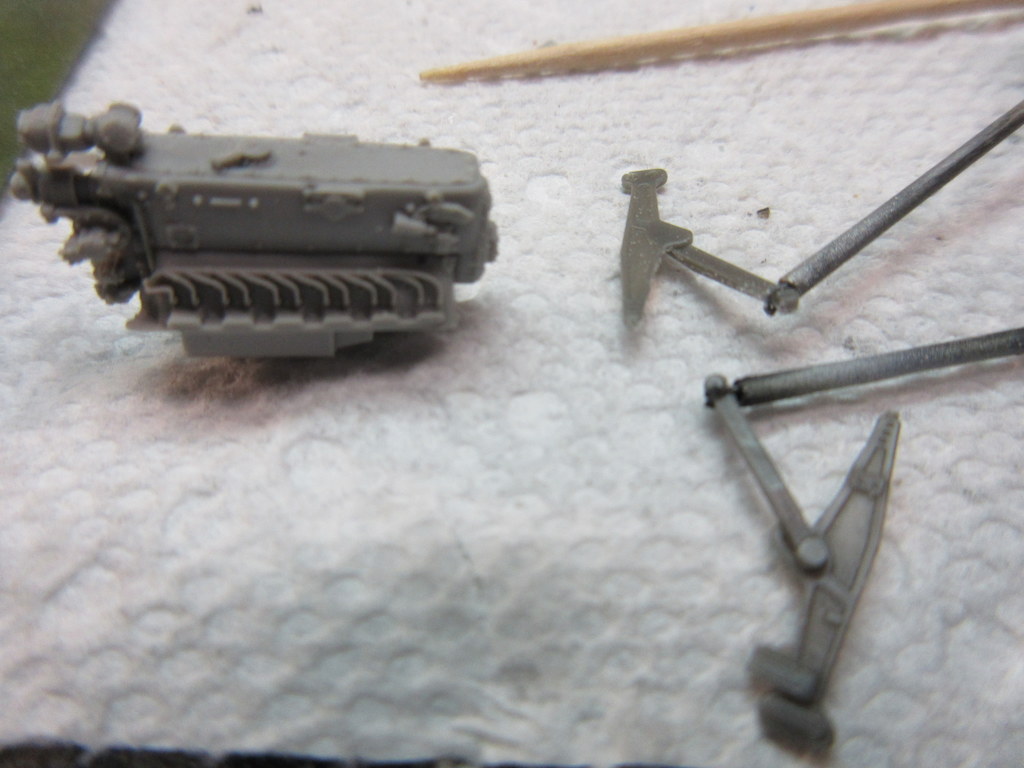
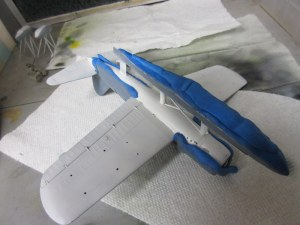
Next up is completing the cockpit by finishing the cockpit roll bars, rear gun site, masking the canopy, and gluing that into place, then we will start with the wings and the Aires engine set.

Aires Ju-88A resin-etch set

I started the ProModeler Ju-88A around Christmas time so much of the work here was around the first of the year.

The parts replace the kit components in a very nice fit.  The set was painted with a variety of paint, mostly centered around Vallejo ModelAir.  After airbrushing with a slighly lightened mix of RLM66 I added a bit more white and highlighted some of the features.

After putting the cockpit together, including a nice set of harnesses, I fitted the cockpit section together and tested the fit.  The set required some size reduction using the old trusty belt sander but once cleaned up fit like a glove into the kit parts.

Normally to improve fit I would attach the sides of the front section to the sides of the rear section and  then glue the completed sides together but on this kit it made more sense to capture the cockpit details in a completed front section and then glue it to a completed rear section as I needed to make sure all of the front parts, including canopies, fit well.

There are other details in the set like the guns that will be added later once the kit is completed.  But overall I enjoyed building the cockpit.

I’ll cover the kit construction in the next installment.


Marine Corsair

Finally, another kit completed this year.  That makes 3 this year.  Normally I build 7 – 8 per year but my Boy Scout hours and other things have kept my modeling hours short.

I finished a Tamiya F4U-2 on the heels of the Monogram TBD I documented in a previous post.  This kit had some interesting challenges.

I built this kit once before many moons ago and it went together like a dream.  I decided to use a True Details resin cockpit on this kit and in my mind, it wasn’t that much of an improvement over the kit parts, and the trouble I had putting it in even detracted a bit from the overall completion.

Here are some comparisons between the kit and resin.  Other than the built-in seatbelts in the resin (which are out of scale), I think the Tamiya cockpit had crisper detail.

I also had a wild hair about using hairspray to do the chipping.  This had worked wonderfully on a previous build (see https://dlloseke.wordpress.com/2017/09/09/hasegawa-hurricane-mk-iic-night-hurricane/ ) but I had a couple of problems with this.

First, the original build was a single color aircraft.  To use the hairspray you paint the kit the chipping color (silver here) and then cover it with hairspray.  You then paint a water-based paint (I use Vallejo) and by wetting the paint before it is fully dry use a stiff paintbrush or toothpick to remove the chips (the hairspray “melts” under the top coat and allows the paint to be removed.

With the tricolor of the Corsair, I had to create multiple layers of paint which then were harder to remove.  Spraying the Vallejo too heavy in certain areas caused the hiarspray to melt under the wetness of the paint.  I think I overdid the chipping.

Two other issues; 1) if you are not careful the brush will remove a big chunk of paint all at once – oops, and 2) the Vallejo Sea Blue color did not cover the silver very well in thin coats which gave me more of a dark metallic blue top coat than the weathered flat sea blue I was trying for.

Finally, after decals,  the kit received an oil dot filter coat of paint and then my standard raw umber panel line was to grub it up.  Once dry that was followed by various pastel highlights to finish the weathering.

I enjoyed the Tamiya kit!

Next up, on to the desert!  Maybe I can get a couple more done before the end of the year!

Boys in Blue

NEXT!  They always told us not to say that to the next customer waiting at the airport as it made it seem like a fast food place.

But anyhow, Huey is finished its time to move on to the next project while the fire is in the belly.  I’ve been waiting to tryout a set of Vallejo US Navy colors my son bought me for Christmas and am opening up the Tamiya Birdcage Corsair and a bagged Monogram TBD-1.

The plan at this point is to build the TBD-1 out of the box.  I still need to purchase a set of decals for it but I see the Starfighter decals are available in places including eBay

The Corsair will be off of the Owl Decals Marine night fighters.  I have fallen in love with Owl Decals and have used them in a number of previous night fighter projects.  You can find those looking through my earlier blogs.

I’ll build it using the True Details cockpit detail set.

This Corsair kit has a bit of history.  Many years ago my wonderful daughter was 3 years old when she figured out how to get into daddy’s model display.  I know she knew how much I liked the models I built and wanted to play with them too.   It took me a few minutes to realize that what I heard was the sound of breaking styrene.  When I break a model I always say “They started out in pieces, we are just helping them return to their natural state”  I just had help this time

She got the Tamiya Fw-190A3, the Hasegawa F-14, and the Tamiya Corsair.  I have now built another Fw-190, this is the Corsair replacement (after 16 years), and the Tomcat is on the to do pile.  Then there will be harmony again in the styrene world.

I spent most of the weekend working around the house and the time I did get to work on the kits was sawing detail pieces out of resin blocks.  I was reminded that when I  was young I could have put the whole kit together in the time it takes me to prep a set of resin and etch for a kit.

Double (double) Century series

After completing the CF-104 (last summer – many moons have passed) I was inspired to add yet another couple of two seat century series; an F-100F and F-105G, both in Wild Weasel configurations.  Both of these kits gave me the chance to use some old Floquil ‘Nam camouflage paints I have been storing for just this moment.  I’ve had them for 15 plus years!

The Trumpeter F-100F is a wonderful kit, the first Trumpeter kit I have built.

I used the Aires F-100F set for the cockpit and was pretty pleased with the result.  This set wasn’t quite a fiddly as the Backbox F-105G and contained some nice photo etch.  As you can see the pit looks pretty good inside the fuselage shell.


Next up was the venerable Monogram F-105G.  I left the panel lines raised on this one, different from the F-105D I had built earlier in which I rescribed the panels.  The cockpit set was very nicely detailed but was a bit fiddly to add all of the parts.  No photo etch with this set.


Both aircraft were painted with the ‘Nam colors previously described –  freehand.  I am surprised I waited so long to do a ‘Nam camo as these were a staple in my earlier modeling years.  The FLoquil paints were fabulous.  I sure am sorry Testors pulled the plug on them.

F-100F armament comes from two of the Hasegawa sets, and the Monogram kit had it’s own.

A nice couple of 1/48 two seat Century Series to add to my collection.  I now have single-seat F-100 through F-106 and two-seat F-100F, CF-104D, F-105G, and F-110 (Phantom) with an F-106B waiting in the on-deck circle!

Third Bf-110 is underway

I am building the third Bf-110 in a row.  I’m inspired by a fellow blogger who builds multiple kits of the same kind at the same time, recently a bolt load of A-10s.

This is another Eduard, got it cheap on Squadron.  I am using the Eduard Big Sin set for this; it comes with a cockpit, engine, wheels, and open nose armament.  All the casting are great and the fit of the kit is precise and the resin fits perfectly.  I don’t know how many times I’ve wrestled other company’s resin sets into a fuselage.

I finished the last two 110s in night fighter schemes, this one will go into a desert scheme with another OWL deal sheet.  Looking forward to getting to painting but I have been steady on the airbrush building and painting a lot of sub components.  Hopefully ready for camouflage this coming weekend.

IMG_1048   IMG_1049   IMG_1050   IMG_1052   IMG_1051   IMG_1053

I’m gearing up for the big event in the Summer of Messerschmitt.  After the 110s are done I am going to build 3 1/32 scale Bf-109s; and E, F, and G at the same time.  A couple of these are old and I don’t plan on doing any re-scribing, filling, sanding (well maybe a little), or weathering.  These are going to be out of the box.  I have a set of decals that cover all three from AML.

IMG_1056  AMLD32003 JG 5 over the Far North AML 1-32


Messerschmitt night fighter twins are done

The summer of Messerschmitt rolls on.  Got the nightfighter twins done.

Both kits were inspired by an Owl Decal sheet; one all black and one apparently an all black oversprayed randomly by RLM76.  The oversprayed model took a bit of thought on how to execute the overspray but turned out great and looks a lot like the decal diagram.  It looks like many different colors but the subtle thickness of the RLM 76 makes it look multi-color.

IMG_0988 IMG_0985 IMG_0986

Th RLM 76 overspray was an Eduard Profipack and it has a lot of nice detail.  Other than the fit of the wings to fuselage, which took a bit of fitting, the kit went together flawlessly.

IMG_0987 IMG_0977 IMG_0971 IMG_0965

The other kit was a monogram kit I have kept for near as I can figure 48 years.  Back when I was a middle schooler earning kit money mowing lawns I’m sure I picked this up on one of our summer excursions to Chicago from Rockford.  Not sure if it was Al’s Hobbies or one closer to Des Plaines but it was carried by my folks for many years until they gave me all of my unbuilt kits one year in a box.  I had wanted back then to build it into a night fighter and here you go.  Sometimes those hobby plans take a bit longer to materialize!

IMG_0983 IMG_0982

The kit was added to extensively.  I am building a third Bf-110 right now with an Eduard Big Sin sets, which includes a resin cockpit, so that kit donated the cockpit to this kit.  It also has resin wheels that I molded and copied off the Eduard kit, and a vacu formed canopy.  With all the modern stuff I haven’t had to do a vacu form technique for a while.

The canopy from the kit was too narrow and too thick.   So I cut it in two, added a middle spacer to spread the canopy out a bit, sanded the whole thing smooth, vacuformed it on the trustly Mattel vacu-form machine, then added frames using thin cut scotch tape and then carefully painted by hand.  I think it looks pretty good and you can see the inside of the cockpit without me opening it up. It may not be entirely accurate but it looks pretty good after a dip in Future.

IMG_0824 IMG_0823 IMG_0789 IMG_0790 IMG_0822

I have to go finish the Bf-110 stepchild -going to make it to be a western desert aircraft, a long ways away from it’s nightfighter brothers!

Kingfisher weathering and old Bf-110 meets new digs

A quick update on the Kingfisher.  After adding paint chipping by hand I added blue/teal/green filter washes over the upper surfaces.  Filter washes as discussed before start with very small dots of oil paint which is then spread around the surface in a small area with turpentine and excess whisked away with a brush.  It breaks up the painted surface.

Here are a few pictures.  Next step is to do the same with small dots of white to fade the upper surface and add a sun weathered appearance.

IMG_0756   IMG_0755

IMG_0754   IMG_0753


Next I have been spending some time taking a cockpit from and Eduard Bf-110 and converting it into a old Monogram Bf-110.  I was amazed how well it fit.  Here is what the cokpit from 1967 would look like if I built the kit almost 50 years ago…

IMG_0759

And today I have put the Eduard cockpit into the kit and I am amazed at how well it fit.  I haven’t closed up the Monogram kit yet but will do that later this evening!

IMG_0752 IMG_0757

After this, complete gluing the wings of the Monogram kit to the fuselage and I’ll have two kits to paint black; one modern, one from yesteryear.

Kingfisher update – and the summer of Messerschmitts has begun

It has been over a week since I painted the Kingfisher.  I used the D-Tack blue stuff again on this to create the tri-color soft camo and it seemed to work well.  I may never have to freehand an airbrush job again.

IMG_0644  IMG_0646

The kit is coming right along, and I have started weathering and decaling it.  The decals were few; star and bars, hull number, and a few stenciles.  Looks very simple and elegant.

IMG_0702  IMG_0701

IMG_0704

I have parked this one for a bit while I have been working on the three Bf-110s.  I am building two Eduard 1/72 and one Monogram 1/72.  The Monogram one is a kit I bought in 1967.  I have wanted to paint a Bf-110 in all black night fighter camo since I was in middle school.

The first kit is the Eduard  profipack and had all of the color photo etch and masks.  It’s my first time using pre-painted photo etch.  Colors are a little bright but it’s like the D-tack stuff – never have to paint an instrument panel again, and in 1/72 that can be some intricate work. (Not sure I like the photo etched seatbelts either!)

IMG_0710   IMG_0719

IMG_0721   IMG_0723

The kit went together like a dream.  It’s been a long time since I built a 1/72 scale kit and the new technologies are amazing.  Only problem I had was the the top of the wings didn’t quite come up quite high enough which meant I had to do a little filing and fitting.  I’ll see if that is any different on the last Eduard I build (#3)

IMG_0726   IMG_0727   IMG_0730

After completing the first kit, I am going to pull the cockpit parts out of the Eduard #3 kit and put them into the Monogram kit.  I did a bit of a test fit using the cockpit from the first Eduard kit to see how it would look in the Monogram kit.  I needed to Dremel away some plastic in the monogram kit but it looks like I have a possibility to make it work (remember the Monogram kit comes with just a pilot and a few odd things inside, but no cockpit.

IMG_0713

The third kit, the other Eduard kit, will get treated to the Eduard Bf-110 Big Sin set which included cockpit, engine, forward gun bay, and wheels.  The set (in 1/72 scale) looks wonderful and intricate.  More photos on that in the coming posts.

IMG_0731  IMG_0736

IMG_0732  IMG_0737

Progress on the 1/48 Navy builds

Been making some progress on the 1/48 Kingfisher and F4U-5N.  The -5N is all sealed up and I’ve started to test fit the wing to the fuselage.  I suspect that this one will be ready for painting all too quickly.  I’m already starting to geek out on how to paint and weather her all black.

IMG_0328 IMG_0351 IMG_0354

I love using the MEK for my cement but it has a tendency to get away.  Not shown here but oddly one of my eye brow hairs got loose on the model and when I applied the MEK it somehow wicked along the hair on the wing leaving me something else to sand smooth.  Never have I…

I really like the engineering and fit of the F4U.  It’s a ProModeler kit (I’m almost sure it Hasegawa) and it’s the second PM kit I’ve built this year and both have been outstanding builds.  This one has a few more ejection marks in bad places but the fit has so far been great

That said, I’m also completing the inside of the Kingfisher.  Best part is that the wings are already mounted so when I glue the fuselage together it will almost be ready for painting as well.  I’m already thinking about what kind of base would look good for this; catapult, in the water, or a 1/2 ramp-1/2 water on dollies looking like it’s half out of water.  Hmm…  One of the best parts of modeling is the planning; shaking the box, thinking about building, planning and replanning the markings (what kind of decals can I get), do I put it on a base or not, etc.  I think I spend more time thinking than building, but I’m trying to change that this year!

 IMG_0326  IMG_0324  IMG_0325

As you can see by the last photo I am scratch building the life raft structure into the behind the cockpit area.  The Lone Star resin set adds so much to this old Monogram kit.