Fourty-nine

That’s the number of kits I have on the model shelves.

I needed to condense the models on the shelves so that I could get more on them.  They were also sharing the space with a lot of cat fur and dust so I decided to take the slew of them down, clean them and the shelves, and put them back on the shelves.

I took these photos of the lot parked on the dining room table, cleaned waiting for clean shelves.  I was happy didn’t need to toss any of them.

I built these over about 12 years.  I have one in here that is about 25 years old and a complete set of Monogram 1/48 Century Series fighters.

USS Reasoner in tiny scale

Just completed an AFV Knox Class Frigate.  I’ve had this around for years and it is a bit special as I completed my 3rd class Midshipman cruise on her in the summer of 1974.

The kit uses the Flagship model PE set.  It worked pretty well but I had a lot of trouble learning how to attach the railings.  I even purchased the “How To” CD from Flagship – it didn’t really help despite being touted as “everything you ever wanted to know about photo-etch”.  It told me a lot about how to make photo-etch and how to bend but nothing on helping me with glues and how to attach complicated parts.  Not recommended.

IMG_3532

I needed to scratch build the BPMDS (Sea Sparrow) launch on the aft deck in place of the CWIS gun and cut up the decals to represent 1063 as I knew her.

The kit had a few area on the hull that needed attention due to sink holes.  But generally the fit was good and the kit and photo-etch structures went together well.

Here’s the final result.  A final learning is that I used pastels to gently weather the kit like I do on aircraft kits but found on haze gray that the colors get darker with a coat of Dullcoat.

Lower Main Mast Standing Rigging is Done!

I’ve been rattling away a bit at a time on this lower main shrouds.  Spent most of this afternoon on the starboard side.  I can’t believe how much time it take to add all of the ratlines.  Was thinking about how nice it would have been to use the ones from the kit but once you see the result… Nah..

Lower main mast rigging and main mast stay are done.  Time to park the ship back on the mantel whilst I tackle some other kits.

lower main mast 1  lower main mast 2

I’ll get back to this kit in a couple of weeks to start the mizzen mast – goal is to complete by Christmas!

Constitution Main Lower Shrouds are done – time for ratlines

The main mast shrouds are done.  Time for the task of adding ratline (these are the footrope the sailors used to climb aloft).

Here a shot of the shrouds (note part of the stash in the background).  This equals 16 pair of deadeyes

main mast rattle 2

Next is how we rattle the shrouds.  I have a piece if paper marked with equal lines I please behind the shrouds to line up the ratlines.

There are two ways to put the ratlines on; bring them across the shrouds and tie a clove hitch at each shroud, or the quick way I do them with a needle and thread.  This goes a lot faster for me.

main mast rattle 1

After they are done cut the loops on the end and make sure they are straight and the shrouds are aligned and a drop of super glue on the ends, trim up and it looks great!


Constitution Mainmast Shrouds

Stepped off the airplane circuit for a bit while I continue to rig my Revell 1/96 constitution.

If you’ve built one of these Revell wonders in the past you will remember that the shrouds and ratlines come to you in the kit prepackaged.  You cut them on a pattern and tie them to a set of plastic deadeyes that resemble the real thing as shown here in a previously built Revell Cutty Sark.

cutty deadeyes

The plastic stuff wasn’t going to be good enough for the Constitution.

I’m rigging the main mast shrouds.  I previously installed the lower set of deadeyes when I assembled the hull.

Unlike model airplane building this involves hours of repeated tasks.  There are 16 individual pairs of deadeyes and each one rigged to a shroud requires two siezings (wrapping thread around the strand to hold them together) and running the thread through the deadeyes to pull down the shroud.  Over and over again!

deadeye1  deadeye3

But the results can be worth it and shown in the foremast shrouds completed here.

deadeye2  OLYMPUS DIGITAL CAMERA

Half way done with the mainmast, then I get to rattle them all down, rig a few stays, and onto the Mizzen Mast!


USS San Diego done just in time for 2013 end

Happy old year!

Finished the kit.  Pushed to day to get it done so i could claim it for 2013.  I doubled my output (only finished two kits this year).

Put the railings and rigging on.  I might have been able to do it a bit better but this was a learning kit (my first 1/700).  Working with super fine photo etch and water modeling were my big take aways with this kit.  That and painting mostly with acrylics.  Here are the results.

IMG_0101 IMG_0102 IMG_0103

To finish it I need to complete the moldings around the plywood then on the shelf.

See you next year.

Dave

CL-53 San Diego in final stages

Greetings!

Been working slowly on this as well as being busy for the holidays.  No matter how much I fantasize about spending my holiday break in the garage doing hobbies something or someone always seems to need my time.  But it’s been a nice break and I’m pushing to get this thing done by the end of the year so I can claim it as a 2013 kit.

san diego

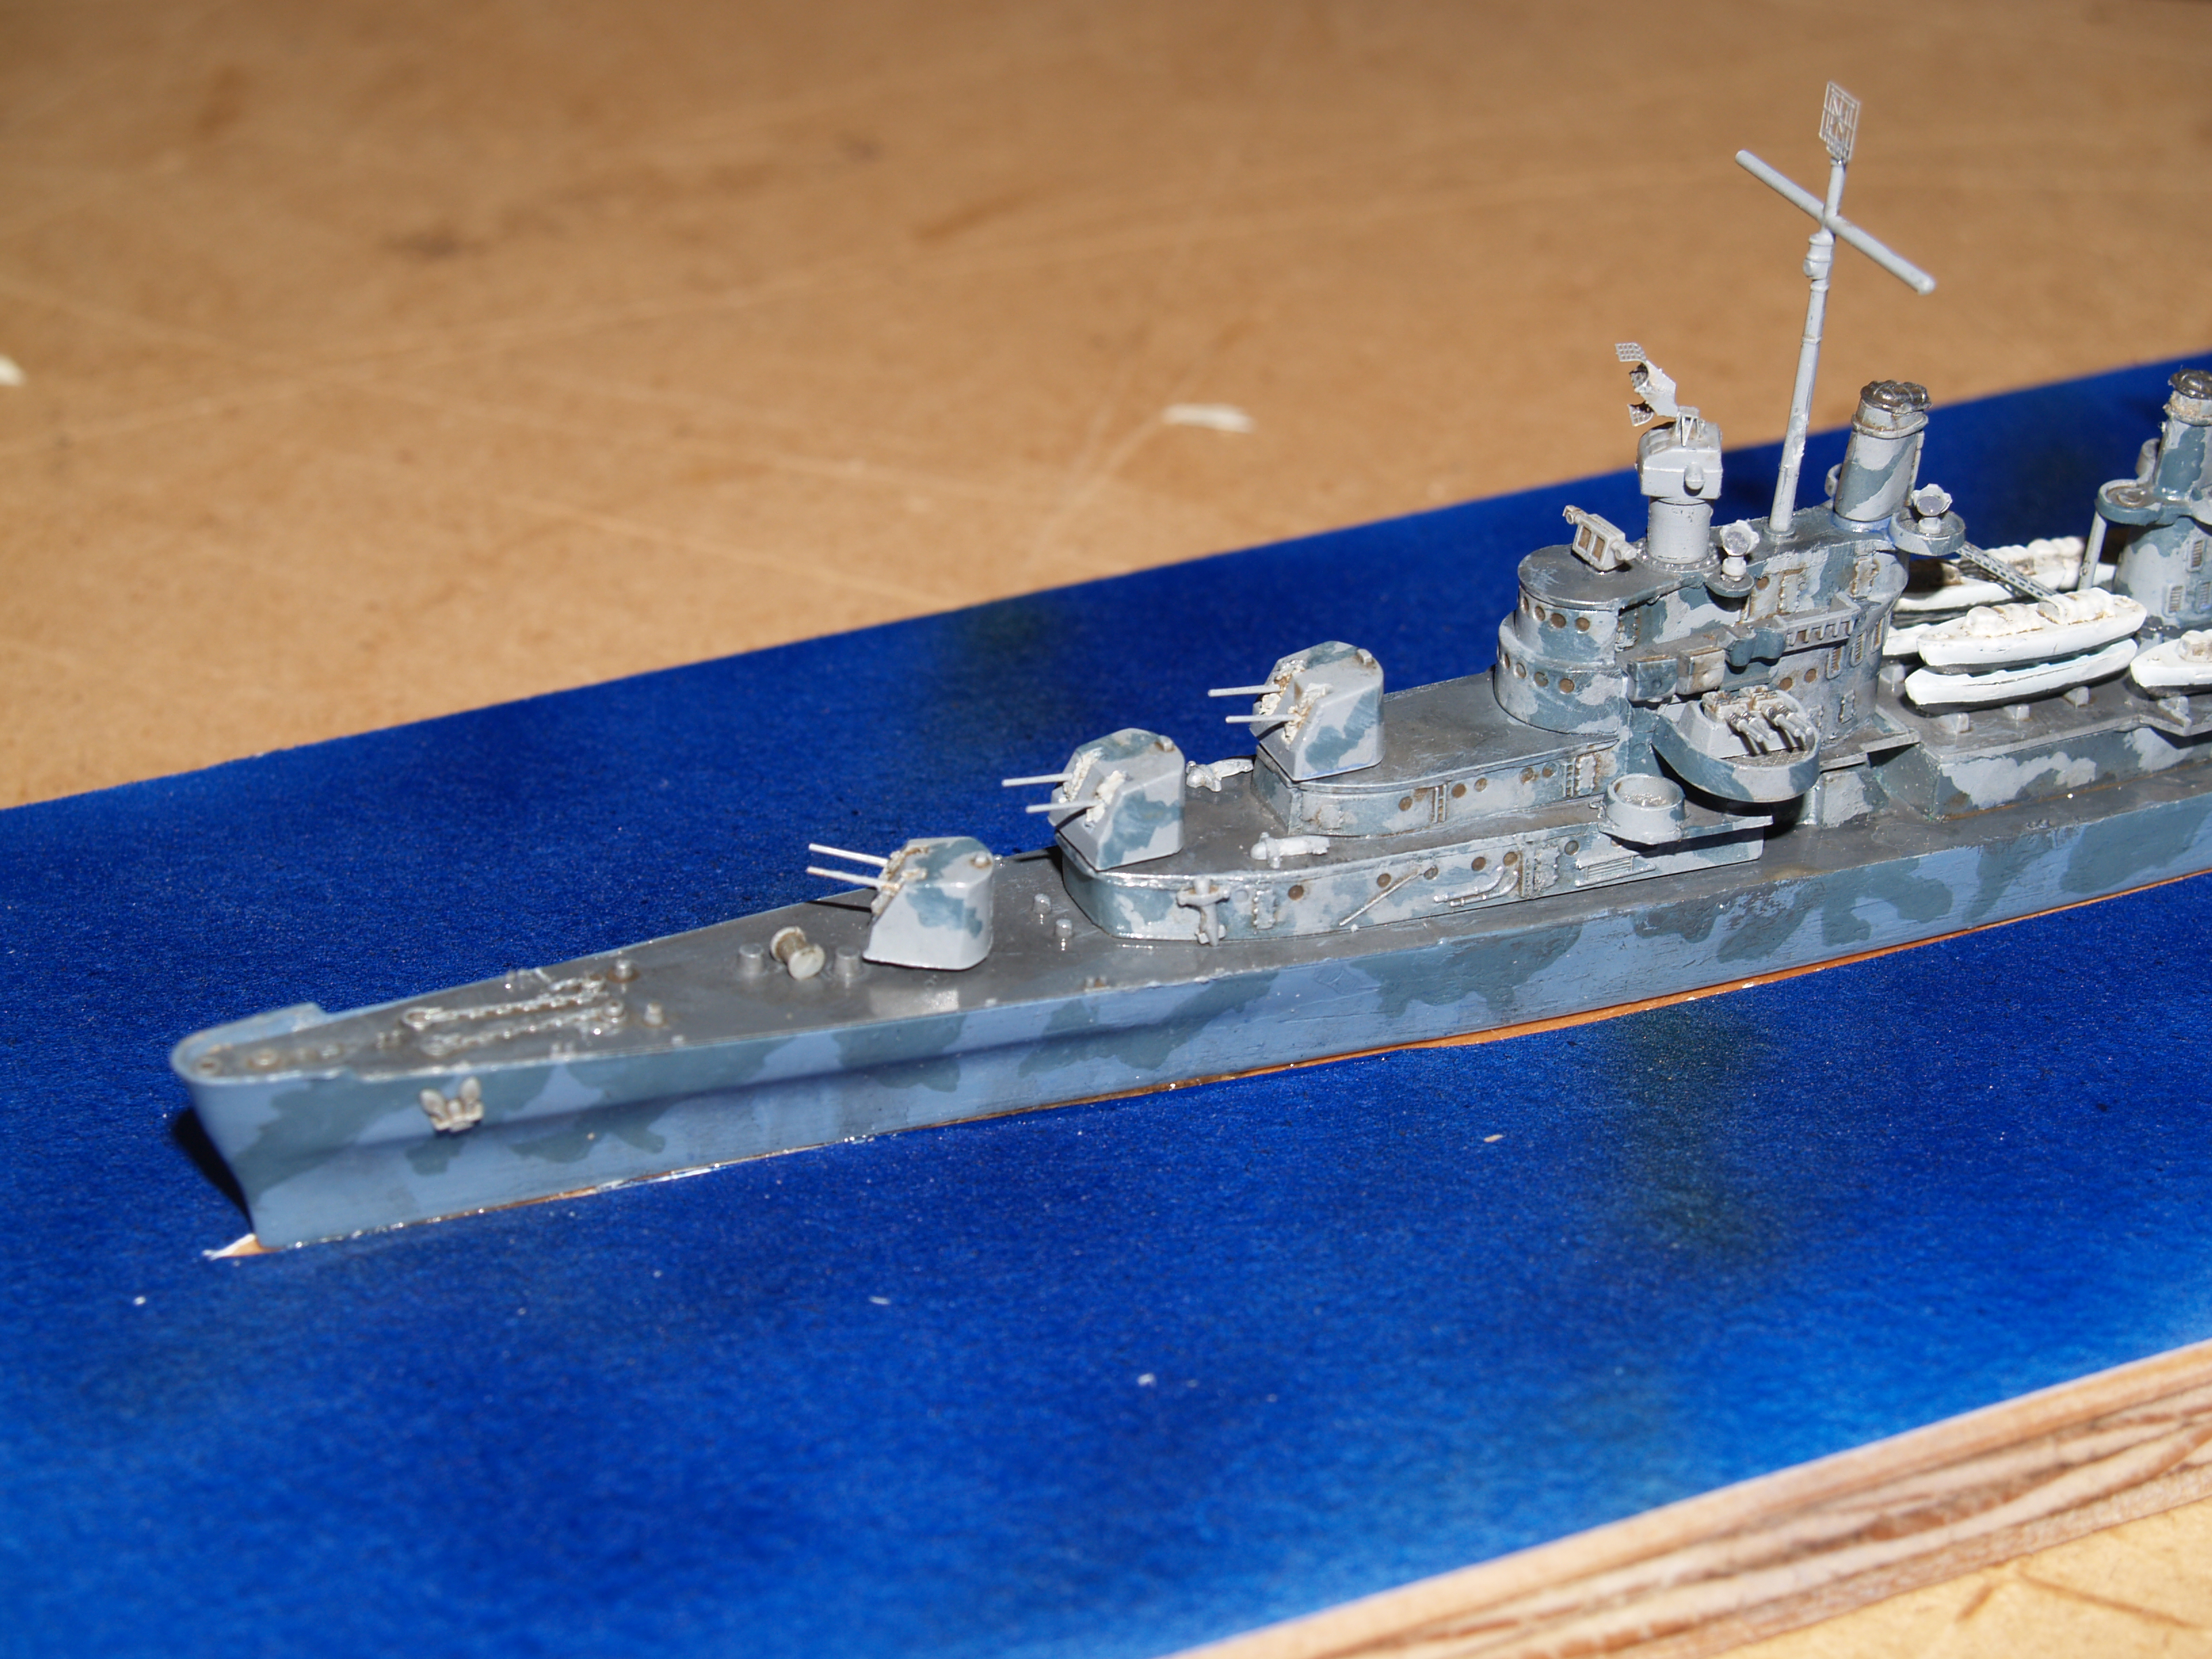
In the last post I spoke about paining with acrylics.  The acrylics have been nice as I  usually weather with oil washes and for this I didn’t need to coat it in Future Floor Wax before washing.

The method I used for weathering/washing the kit are explained in a book that I found invaluable to help me through my first 1/700 kit; Ship Models from Kits by David Griffith.  Here is a link to Amazon

http://www.amazon.com/Ship-Models-Kits-Advanced-Techniques/dp/1848320914

To weather I first applied a very diluted black filter wash.  This is to break up the mono-tone of the camo.  Then a white diluted wash in certain spots on the topside as this will break up more of the color and help the colors be more sun bleached.  Then a blue oil wash to the sides of the hull.  Reason given in the book was that the ships reflect the sea water around them.  Along with this I did a pin wash of black around some of the features then a pin was of burnt umber in places where I wanted to show some rust.

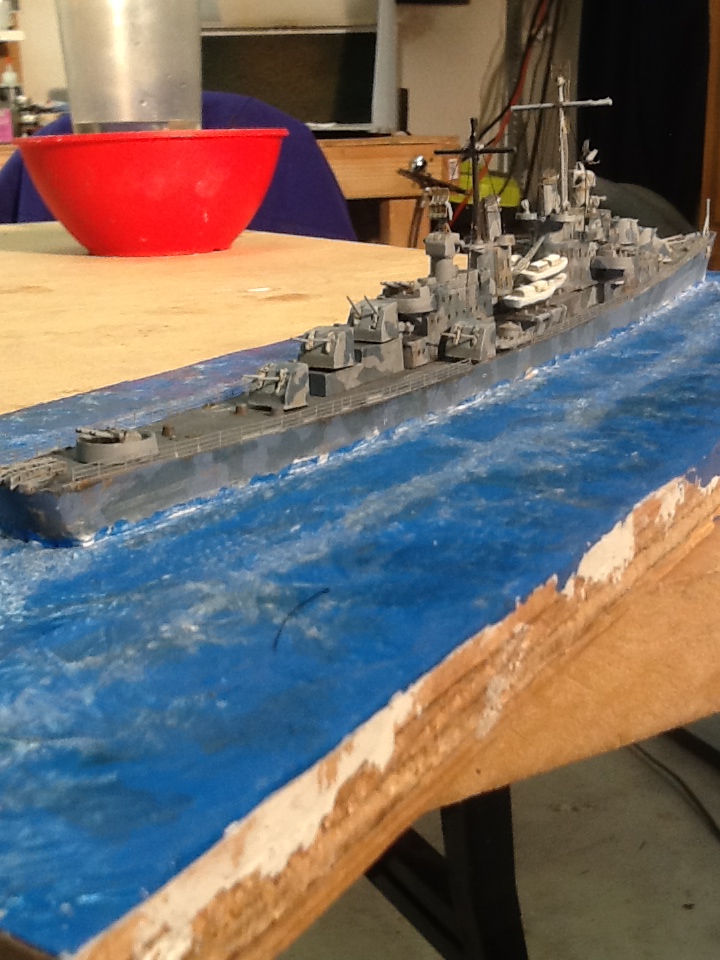
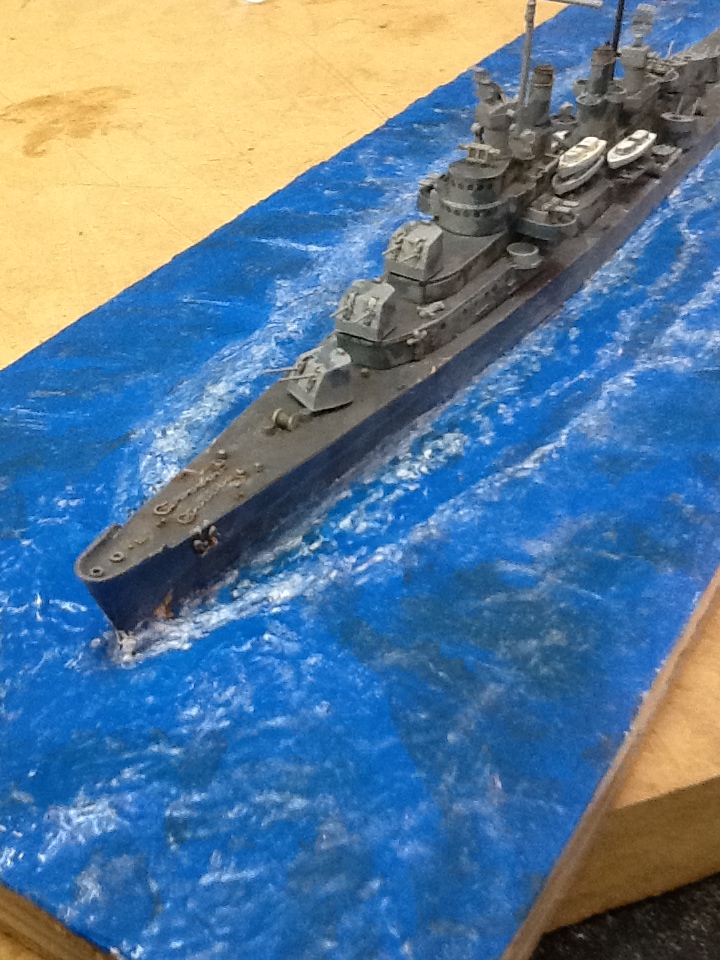
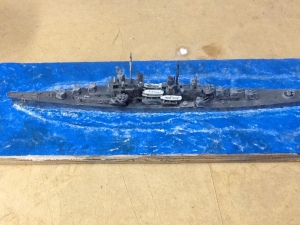
Next I glued a piece of water color paper to a piece of plywood and painted it blue.  Before the glue dried I cut out the shape of the ship in the middle and epoxied the ship to the base.

Next, using the techniques described in the book I used acrylic paste to set up the bow waves of the ship and put some rough water shapes down.  After that dried, I used some more paste to create the rest of the water outside the ships movement.

Once dried I painted it all blue (I think the blue is too bright, I will use a darker blue next time.  I then took the blue and added some black and highlighted the low areas of water, followed by the blue mixed with green and generally laid some patters in the water to break up the solid blue color.

This is then followed by arcylic gel.  Lay down a layer and whip it up into rough water/waves using a wet paint brush.  The gel took 24 hours and dried clear.

Finally I applied the white in small batches to form the bubbles and wake of the ship, as well as dry brushing sections of the water to highlight waves.

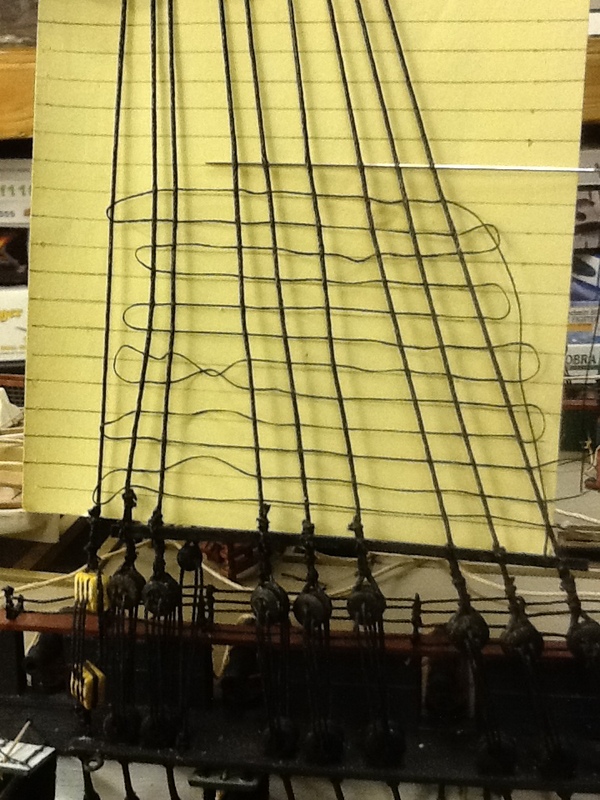
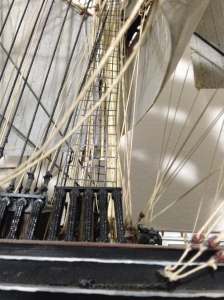
Once all dry, I shot the model with dull coat and the ocean with semi-gloss coat and the model is ready for rigging and photo-etched rails, which I will cover next.

San Diego bow     San Diego stern

Happy Modeling.

Dave

USS San Diego – CL-53

Happy Hollerdays!

While I’m on a role posting my first blog in a few months I decided to continue on and talk about my lastest project, that which I’d like to have done before the end of the year!

I’ve been sitting on a DML USS San Diego.  My guess is that this is the old Matchbox Atlanta class cruiser model.  When I bought the model years ago it came with a etch sets from Tom’s Model works for Atlanta class ships.  Here it is in it’s current state…

OLYMPUS DIGITAL CAMERA

I decided to build the ship as it was painted in the early war.  That camouflage is a rather elaborate set of blotches and squiggles (I never can seem to build the mono-color projects) and so we were off.

I don’t do US Navy ships so I don’t have the colors to paint them.  I could tell you about various RLM and FS colors and probably have jars full but when it cones to Haze Gray or Deck Blue – nada!  So I went off in search of what colors I needed.  There are a number of places you can Google bu I found this link to be particularly helpful.

http://www.internetmodeler.com/2003/august/ships/color_part_1a.htm

Doing some research I discovered that the colors for my ship in the early war were called Measure 12 and they consisted of;

5-S Sea Blue – Sides of Hull, part of camaflouge

5-O Ocean Gray – Other color for hull and for topside camo

5-H Haze Gray – Other color for camo on topsides and the remaining fixtures like masts and and rafts

20B Deck Blue – for all horizontal surfaces

I decided to go way out of my comfort zone on this and I ordered Vallejo paints based on the link above.

The acrylic paints have been a blessing and a curse.  First they are real easy to use and go on pretty good.  The Vallejo Air color goes on straight from the bottle and the Vallejo Color requires a few drops of Liquatex Air Brush medium to thin the pain and help retard drying (which will gum up the point of your brush).  The cure part is that after I primed the model and painted the first color I thought I would try liquid mask to created the complex camo but when I went to take it off it took off the first color with it.  I had to repaint the hull and hand paint the camo, and the Vallejo paints take a couple of coats to hand paint and are therefor thicker.

Next post I’ll discuss building and weathering the ship and prepping it for further work.

Dave

First Modelling Post

Greetings and welcome.  If you are looking for the two legged modeling blogs this is not it.  This blog is devoted to building scale models of aircraft, ships, and military vehicles.

I have been building models since my Dad first let me put together a Revell B-47 kit in the 1960s.  Although my work is spotty due to family, work, and volunteering (Boy Scouts) I manage to get a few done each year.  I’d like to talk about that here.

I frequent three modeling blogs on a regular (almost daily) basis;

http://www.hyperscale.com/

http://www.modelingmadness.com/whatsnew.htm

http://www.cybermodeler.com/whatsnew.shtml

on a daily basis.  I find their post easy to ready and they cover a wide gamut of topics.  I even use Hyperscale to buy and sell kits from time to time.

I am currently working on;

1/48 DML Fw-190A-8/R11 Nightfighter – I have had this kit started since 1997 and have been trying to figure out how to open up the engine compartment and put a  CMK BMW801 engine into the kit.  It is my drive right now to get it done

1/96 Revell Consitution – Of all of the kits I have built in my life, I love the Revell large scale ship models.  I have the foremast on this and I am rigging the ratlines by hand with real wooden deadeyes instead of using the cheesy ones that come pre-made in the kit.  Stopped working on this to go back the the Fw-190.

1/64 Mamoli Marseille wooden ship kit – I have the hull frames put together and hope to get to planking the hull soon.  It is my eventual goal to scratch build a couple of wooden ship kits from plans I have.  This kit and the Revell’s have prepared my for the jest of sailing ship modelling.

I’ll take on the Fw-190 here next

That’s all and happy modelling.