After a taste of WWI with the Fokker Dr1 in the previous post, I decided to step into the world of biplanes with a Be 12 I purchased off of eBay.
It has been an interesting experience.
First, this was the second time I bought a kit off eBay that looked complete until I went to build it many moons after the purchase. In this case, I observed that part of the landing gear struts was missing. A previous owner, maybe not even the guy I purchased it from, sought to tear a small hole in the plastic bag and take 1/2 of each of the landing gear struts off. I can’t imagine what for, but they would have had to cut the back part of each strut off the whole piece to take it. Odd!
The kit is very detailed and consists of very soft plastic. Any flexing of one of the soft parts could cause it to fail. However, the kit had a lot of detail in some of its small parts and comes with a range of bombs and WWI rockets to use. There were a lot of parts left over and I think Roden must have made these kits for a multiple of variants.
The cockpit is sparse and the instructions overall are very hard to determine just where parts go and what their orientation is. I would recommend that anyone building this kit to have some form of reference to determine just what some of the parts are for. Or course, this might just be my ignorance of WWI biplanes and how they operate.
The parts went together mostly well without too many gaps, the nose section being the exception.


You must be careful aligning since there are no pins or guides. I actually moved to using superglue instead of Tamiya thin cement since the plastic was so soft the thin cement didn’t form a very good welded bond.
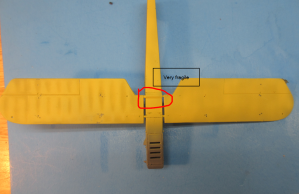
The lower wing fits into the fuselage and there are two small plastic sections that separate the fuselage from the lower wing, molded into the part. One of these continuously failed (broke) and I needed to be very careful moving the fuselage/lower wing unit around as not to cause the lower wing to flex too much and break off. It didn’t get secured until I finally got the top wing onto the part (more later). Had I knew this beforehand I would have replaced the plastic connectors with tubing.

After building the kit (leaving the top wing off until last) I painted the top with Testors Marine Green (seemed close enough) and the bottoms with Humbrol linen, and the decals applied after a coat of future. The decals did not respond at all to setting solutions and in most cases left very clear areas.

An oil dot weathering was then applied (blue, white, tan on top – brown below) and after a good coat of Testors Dullcoat things started looking a lot better. I was pleased with the way the oil dot weathering diffused the solid green topcoat and the streaking on the linen color looked good. I was pleased the decals blended more into the surface.


The next step was rigging. I have built a bunch of sailing ship models all with complex rigging but this was to challenge for me. I read an online article about drilling a hole through the lowering for each line and after fastening to the top wing, passing the line through the hole and attaching a weight (in my case a clothespin) to it to hold it in place while the drop of glue you put in the hole dries. I added ALL of the lines to the top with before we put the wing on.

After rigging was set I created a small jig that matched the holes in the top wing with for the struts to the fuselage pattern, added the struts to the jig with a bit of white glue, and glued and aligned the struts and left them to dry. The upper wing was then added to the fuselage struts, set to dry for a day, and then the remaining struts to the lower wing were put into place. All VERY delicately!

Rigging was then finished and some of the rigging holes were touched up. Final parts like guns were then added and done!


This was a learning build. I learned that the next biplane I build should have fewer rigging lines! I was amazed at what a complex kit this was and I have a lot of respect for those WWI biplane builders. But I am very satisfied with how it turned out, especially the paint job. Now back to those more modern types for a bit!


